
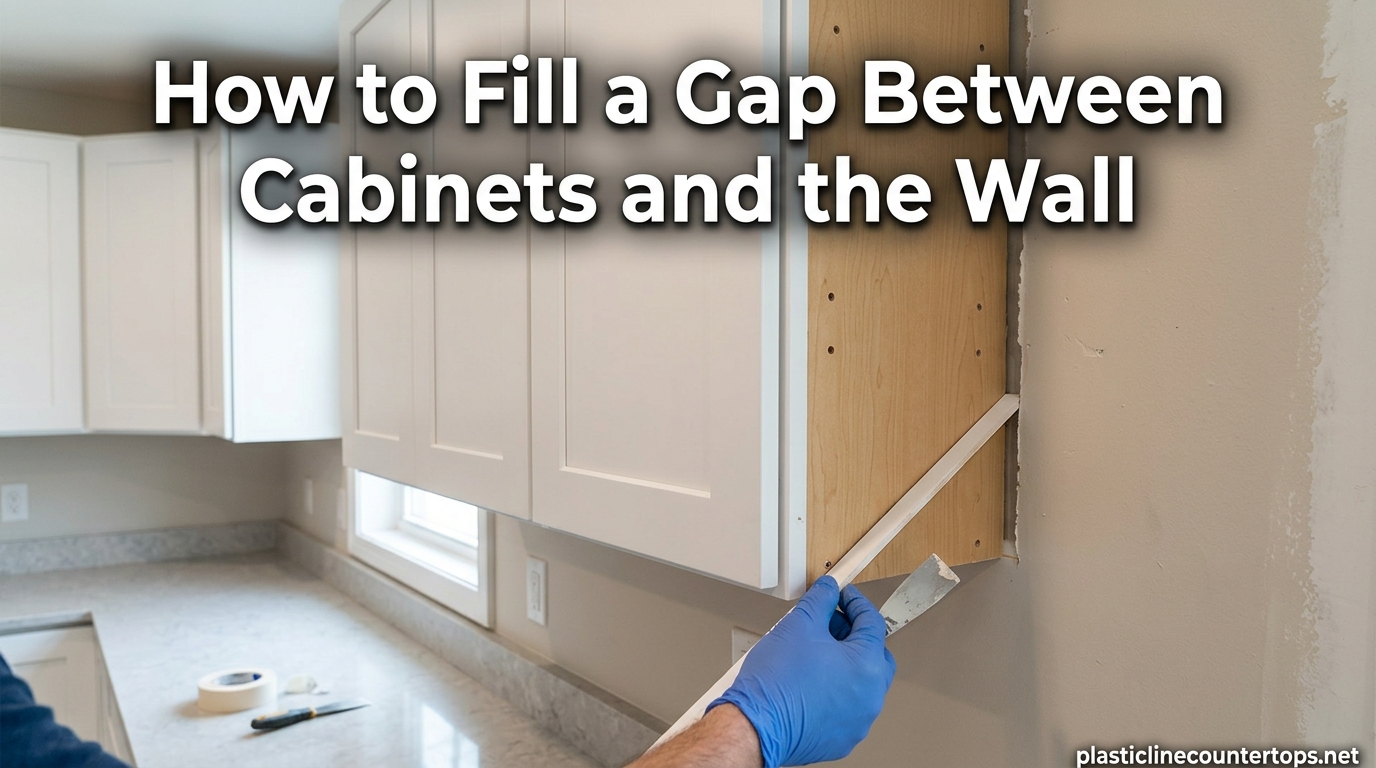
That annoying gap between your cabinets and the wall is more common than you think. Almost every home has them — walls are rarely perfectly straight, and even professional cabinet installations leave small spaces where the cabinet edge does not sit flush against the drywall. Whether you just installed new kitchen cabinets or noticed gaps forming in an older home, learning how to fill a gap between cabinets and the wall is a straightforward DIY project that makes a big visual difference.
I have helped plenty of homeowners tackle this exact problem, and the good news is that the right approach depends almost entirely on one thing: the size of the gap. A hairline crack needs a completely different fix than a 2-inch opening. In this guide, I will walk you through every method, from a quick caulk bead for tiny gaps to custom filler strips for wide openings.
By the time you finish reading, you will know exactly which method fits your situation, what materials to grab, and how to get results that look like a professional did the work. Let me start with why filling those gaps matters more than most people realize.
Table of Contents
Why Filling Cabinet Gaps Matters
That narrow space between your cabinet and the wall might not look like a big deal, but leaving it open causes real problems over time. Here is what happens when you ignore those gaps.
Pests use gaps as highways. Cockroaches, ants, and other insects travel through wall cavities and use gaps near cabinets as entry points into your kitchen or bathroom. One Reddit user in r/HomeImprovement discovered that a persistent ant problem traced directly back to an unfilled gap behind their kitchen base cabinet. Filling the gap cuts off that access route.
Air leaks hurt energy efficiency. Gaps between cabinets and exterior walls allow conditioned air to escape and outside air to enter. This is especially noticeable in kitchens on exterior walls during winter. Sealing those gaps can make a measurable difference in comfort and heating costs.
Dust and moisture accumulate. Open gaps collect dust, grease particles, and moisture from cooking steam. Over months and years, that buildup becomes difficult to clean and can lead to mold growth in humid environments like bathrooms.
It looks unfinished. From a design perspective, visible gaps between cabinets and walls make even expensive cabinetry look like a DIY job. A clean, sealed edge gives your kitchen or bathroom that professional, built-in appearance.
How to Measure the Gap Between Cabinets and Wall
Before you pick up any materials, measure the gap properly. The width determines which method will work best, and gaps often vary in size along their length.
Step 1: Use a tape measure. Measure the gap at several points along the cabinet edge — top, middle, and bottom. Write down each measurement. If the gap measures differently at each point (which is very common with uneven walls), note the widest and narrowest points.
Step 2: Check for depth. Some gaps are shallow and surface-level, while others extend deep into the wall cavity. Shine a flashlight into the gap to see how far back it goes. Deep gaps may need backing material before you apply a surface filler.
Step 3: Categorize your gap. Use these ranges to pick your method:
- Small gaps (under 1/4 inch): Caulk or wood filler
- Medium gaps (1/4 to 1/2 inch): Expanding foam or trim molding
- Large gaps (over 1/2 inch): Scribe molding or cabinet filler strips
- Variable-width gaps: Scribe molding (it conforms to the wall contour)
One important note: if your gap is wider than 3 inches, the cabinet may be undersized for the space, and a filler strip is the only approach that will look right. Caulking a 3-inch gap always looks terrible — I have seen people try, and the result is a thick, sagging mess.
Best Methods to Fill Cabinet Gaps (Quick Comparison)
Here is a fast reference to help you jump straight to the method that matches your gap. Each one is explained in detail below.
- Caulk — Best for gaps under 1/4 inch. Fastest method, paintable, works on straight walls.
- Wood filler — Best for gaps up to 3/8 inch on stained cabinets. Sandable, stainable, harder than caulk.
- Expanding foam — Best for gaps from 1/2 to 1 inch. Fills deep cavities, needs trimming and covering.
- Scribe molding — Best for uneven walls with variable gaps. Flexible, professional finish, matches cabinet style.
- Cabinet filler strips — Best for gaps over 1 inch. Solid wood strips cut to width, attached with adhesive and nails.
Now let me walk you through each method step by step.
Method 1 – How to Fill Cabinet Gaps with Caulk
Caulking is the most common way to fill small gaps between cabinets and walls, and for good reason. It is fast, inexpensive, and produces clean results when done right. This method works best for gaps under 1/4 inch on walls that are relatively straight.
What You Need
- Acrylic latex caulk (paintable) or silicone caulk (for bathrooms and wet areas)
- Caulking gun
- Painter’s tape
- Damp rag or sponge
- Caulk smoothing tool or your finger
- Utility knife
Step-by-Step Instructions
Step 1: Choose the right caulk. For kitchen cabinets that you plan to paint, use acrylic latex caulk — it accepts paint after curing and cleans up with water. For bathroom cabinets or areas exposed to moisture, use silicone caulk, which is waterproof but cannot be painted. Paintable silicone blends exist too, giving you the best of both.
Step 2: Clean the gap area. Wipe both the cabinet edge and the wall surface with a damp rag to remove dust, grease, and loose debris. Any contamination under the caulk will prevent proper adhesion. Let the surface dry completely before moving on.
Step 3: Apply painter’s tape. Place a strip of painter’s tape along the wall side of the gap, about 1/16 inch away from the gap edge. Place another strip along the cabinet side. This creates crisp lines and makes cleanup much easier.
Step 4: Cut the caulk tube tip. Cut the tip of the caulk tube at a 45-degree angle. Start with a small opening — you can always cut more, but you cannot undo a hole that is too large. A smaller opening gives you better control over the bead size.
Step 5: Apply the caulk bead. Hold the caulking gun at a 45-degree angle to the gap. Squeeze the trigger steadily and move the gun along the gap at a consistent speed. The goal is to fill the gap without overfilling. You want the caulk to slightly bulge above the surface, not pool on top.
Step 6: Smooth the bead. While the caulk is still wet, run your damp finger or a caulk smoothing tool along the bead with steady, even pressure. This presses the caulk into the gap and creates a concave profile that looks clean. Forum contributors on r/DIY consistently recommend the wet-finger technique as the most reliable approach.
Step 7: Remove the tape. Peel the painter’s tape away immediately after smoothing, while the caulk is still wet. Pull it back at a 45-degree angle. If you wait for the caulk to set, the tape will pull the bead apart.
Step 8: Let it cure, then paint. Acrylic latex caulk typically cures in 2 to 4 hours but wait 24 hours before painting for best results. Silicone caulk needs 24 hours to fully cure. Apply matching paint to blend the caulked area with the wall.
Common Caulking Mistakes to Avoid
Do not try to caulk gaps wider than 1/4 inch. The caulk will sag, crack, and eventually fall out. I see this mistake constantly — people try to force caulk to do a job meant for trim or filler strips. Also, avoid using pure silicone on painted surfaces, since paint will not adhere to it.
Method 2 – Using Wood Filler for Small Cabinet Gaps
Wood filler is an excellent choice for small gaps on stained or natural-finish cabinets where caulk would look out of place. It works best on gaps up to 3/8 inch wide and produces a hard, sandable surface that accepts stain and paint.
When Wood Filler Beats Caulk
Use wood filler instead of caulk when your cabinets have a stained wood finish and you want the filled gap to blend with the wood tone. Caulk works great against painted walls, but it looks obviously different next to stained wood. Stainable wood filler can be matched to your cabinet color.
Step-by-Step Instructions
Step 1: Clean and prep the gap. Remove any loose material from the gap with a utility knife or small brush. Vacuum out dust and debris so the filler bonds properly.
Step 2: Apply wood filler. Press the wood filler into the gap using a putty knife. Overfill slightly — wood filler shrinks as it dries, so a little extra now saves you from a second application later.
Step 3: Smooth the surface. Draw the putty knife across the filled gap at a low angle to remove excess filler and create a flush surface. Work quickly, because wood filler begins to set within minutes depending on the product.
Step 4: Let it dry completely. Drying times vary by product, but most wood fillers need 2 to 6 hours. Some fast-setting options dry in 30 minutes. Check the manufacturer’s instructions and do not rush this step.
Step 5: Sand smooth. Once dry, sand the filled area with 220-grit sandpaper until it is flush with the cabinet surface. Sand in the direction of the wood grain for the best results.
Step 6: Stain or paint to match. Apply matching stain or paint. Test your stain on a scrap piece first — wood filler often absorbs stain differently than natural wood, so you may need to adjust the application to get a close match.
Limitations of Wood Filler
Wood filler is not flexible. If the gap is caused by seasonal wood movement or settling, the filler will eventually crack. For gaps that experience movement, caulk is a better choice because it remains flexible after curing. Also, avoid using wood filler on gaps wider than 3/8 inch — it will not adhere well in deep applications and may shrink and crack over time.
Method 3 – Expanding Foam for Medium Cabinet Gaps
When the gap is too wide for caulk or wood filler but not large enough to warrant a filler strip, expanding foam bridges that middle ground. It works best for gaps between 1/2 inch and 1 inch, especially when the gap extends deep into the wall cavity.
Choosing the Right Foam
Always use low-expansion foam near cabinets. Standard expanding foam generates significant pressure as it cures, and that pressure can push against the cabinet and distort it. Low-expansion polyurethane foam grows to about 1.5 times its original volume, which is much safer for enclosed spaces.
Step-by-Step Instructions
Step 1: Prep the area. Cover the cabinet face and surrounding surfaces with painter’s tape or plastic sheeting. Expanding foam sticks to everything it touches, and it is extremely difficult to remove once cured.
Step 2: Fill the gap halfway. Insert the foam applicator nozzle into the gap and apply foam to fill roughly 50% of the void. The foam will expand to fill the remaining space. Overfilling is the most common mistake with this method.
Step 3: Let it cure fully. Wait at least 2 to 4 hours for the foam to expand and cure completely. It should feel firm and solid when pressed.
Step 4: Trim the excess. Use a sharp utility knife or serrated blade to trim the cured foam flush with the wall and cabinet surfaces. Cut slightly below the surface — you want a recess for the finishing layer.
Step 5: Apply a finishing layer. Expanding foam is not meant to be a finished surface. Cover the trimmed foam with caulk, spackle, or a thin strip of trim molding to create a clean, professional appearance. This also protects the foam from degrading over time.
Warnings About Expanding Foam
Wear gloves and old clothing when working with expanding foam. It bonds to skin and fabric permanently. Also, do not use foam in gaps near heat sources, as some polyurethane foams are flammable before fully cured. Always check the product label for fire-rated applications.
Method 4 – Scribe Molding for Uneven Walls
If your walls are wavy, bowed, or simply not straight, scribe molding is the professional solution that adapts to the wall contour. Finish carpenters consistently recommend this approach on woodworking forums, and for good reason — it handles variable-width gaps beautifully and produces a polished look.
What Is Scribe Molding?
Scribe molding is a thin, flexible strip of wood or MDF, typically 1/4 to 3/8 inch thick and 1 to 2 inches wide, designed to cover the gap between a cabinet and the wall. Unlike rigid filler strips, scribe molding can be trimmed to match the exact contour of an uneven wall surface. Many cabinet manufacturers include matching scribe molding with their cabinets, or you can buy paint-grade molding at any home improvement store.
When to Use Scribe Molding
Use scribe molding when the gap width varies along the length of the cabinet — for example, 1/8 inch at the top and 3/4 inch at the bottom. This variation is a telltale sign that the wall is out of plumb, and scribe molding is specifically designed to handle it. You can also combine scribe molding with a thin bead of caulk along the wall edge for a completely seamless transition.
Step-by-Step Instructions
Step 1: Hold the molding against the wall. Position the scribe molding flat against the cabinet face frame with one edge touching the wall. The molding should overlap the gap and extend past it on both sides.
Step 2: Scribe the wall contour. Use a compass or scribing tool set to the gap width. Hold the compass point against the wall and the pencil against the molding. Draw the compass along the entire length, transferring the wall contour onto the molding surface.
Step 3: Cut along the scribe line. Use a jigsaw, coping saw, or belt sander to remove material along the scribe line. Take your time and remove small amounts — you can always take more off, but you cannot add material back.
Step 4: Test the fit. Hold the trimmed molding against the wall and check for gaps. If light shows through anywhere, mark those spots and trim a little more. The molding should make full contact with the wall along its entire length.
Step 5: Attach the molding. Apply construction adhesive to the back of the molding and press it into position. Secure it with brad nails or finish nails every 8 to 10 inches. Pre-drill the nail holes to prevent splitting, especially near the ends of the molding.
Step 6: Finish the edges. Run a thin bead of caulk along the wall edge where the molding meets the wall surface. This fills any tiny imperfections and creates a paintable joint that looks like the cabinet was built into the wall.
Step 7: Paint or stain to match. Apply finish to match your cabinets or wall color. Scribe molding painted to match the wall creates an invisible transition. Stained to match the cabinets, it looks like an extension of the cabinet itself.
Method 5 – Cabinet Filler Strips for Large Gaps
When the gap measures over 1 inch, you need a structural solution rather than just a sealant. Cabinet filler strips are solid pieces of wood or matching cabinet material cut to fill the space between the cabinet and the wall. This is the standard approach used by professional kitchen installers.
What Are Cabinet Filler Strips?
Filler strips are narrow boards, typically 2 to 3 inches wide and 3/4 inch thick, made from the same material as your cabinets. They attach to the side of the cabinet and extend to the wall, closing the gap completely. Many cabinet lines include pre-finished filler strips that match the cabinet color exactly. If yours did not come with fillers, you can rip a strip from matching material on a table saw.
Step-by-Step Instructions
Step 1: Measure the gap at multiple points. Large gaps almost always vary in width. Measure at the top, middle, and bottom. You will cut the filler strip to match the widest point and then scribe or shim to fit the narrower sections.
Step 2: Cut the filler strip to width. Using a table saw, rip the filler strip to the width of the widest gap measurement, plus 1/16 inch. The slight overage gives you material to scribe for a tight fit.
Step 3: Scribe and trim for a tight fit. Just like with scribe molding, hold the filler strip against the wall and use a compass to transfer the wall contour. Cut or sand along the line for a custom fit. Forum members on SawmillCreek recommend doing this in small increments and testing frequently.
Step 4: Attach the filler strip. Apply construction adhesive to the back of the strip. Press it into position against the cabinet side. Secure it with finish nails or screws through pre-drilled holes. Countersink the fasteners and fill the holes with matching wood putty.
Step 5: Seal the edges. Run a bead of caulk along both the wall edge and the cabinet edge where the filler strip meets each surface. This seals any tiny gaps and creates a clean, finished appearance.
Step 6: Finish the surface. Paint or stain the filler strip to match the cabinet. If you purchased pre-finished filler from the cabinet manufacturer, you may only need to touch up the caulk line.
Matching Filler Strips to Your Cabinet Finish
This is where many DIYers get frustrated. If your cabinets have a stained or specialty finish, finding an exact match for the filler strip can be tricky. Your best options are ordering matching filler panels from the cabinet manufacturer, buying a piece of the same cabinet material and cutting it down, or using paint-grade filler and painting it to match the wall instead of the cabinet. Painting to match the wall is often the easiest approach and looks perfectly intentional.
Troubleshooting Common Cabinet Gap Problems
Even with the right method, things can go wrong. Here are the most common problems I hear about and how to solve each one.
The Gap Is Too Wide for Caulk but Too Narrow for a Filler Strip
This is the dreaded middle zone — gaps between 1/4 inch and 3/4 inch. The best approach here is quarter-round molding or thin trim molding. Quarter-round is flexible enough to conform to minor wall irregularities, and it can be caulked and painted to blend with the wall. Attach it with construction adhesive and brad nails, then caulk both edges.
The Gap Varies From Top to Bottom
This means your wall is out of plumb. Use scribe molding (Method 4) and scribe it to match the wall contour. Do not try to force a straight filler strip into a crooked space — it will either not fit or leave visible gaps on one side.
I Cannot Reach the Gap Behind the Cabinet
Gaps behind cabinets, where the back of the cabinet does not meet the wall, are tricky because access is limited. If you can see light through the gap from inside the cabinet, slide rigid foam insulation or a piece of cardboard-backed insulation into the gap from inside the cabinet. For gaps along the top of wall cabinets where you cannot reach, use a caulk gun with an extended nozzle or spray expanding foam with a straw applicator.
The Caulk Keeps Cracking
Recurring caulk cracks usually mean one of three things: the gap is too wide for caulk, there is movement between the cabinet and wall, or you used the wrong type of caulk. If the gap exceeds 1/4 inch, switch to a molding-based solution. If movement is the issue, check whether the cabinet is securely fastened to the wall and tighten any loose mounting screws.
The Filler Strip Does Not Match My Cabinets
If you cannot find a perfect color match, paint the filler strip to match the wall instead. A wall-colored filler strip looks like a natural extension of the wall surface and is much easier to color-match than a stained wood tone. This is a common workaround recommended by professional installers.
Pro Tips for a Professional Finish
These are the small details that separate a DIY-looking job from one that looks like a professional handled it.
Always pre-drill before nailing trim. This prevents splitting, especially at the ends of narrow molding strips. A 1/16-inch drill bit is all you need.
Use painter’s tape for every caulk job. Even experienced pros use tape. It takes two extra minutes and saves you from messy cleanup and uneven lines.
Combine methods for the best results. The most professional-looking gap fills use two materials: a solid backing (molding or filler strip) plus a thin bead of caulk along the edges. The molding provides structure and the caulk provides a seamless, paintable seal.
Test your finish on a scrap piece first. Before you stain or paint your filler strip or scribe molding, test the color on a small offcut. Wood filler, molding, and cabinet material all absorb stain differently, and a test run prevents an obvious color mismatch on the actual installation.
Know when to call a professional. If your cabinets are visibly crooked, if the gap is wider than 3 inches on multiple cabinets, or if you suspect structural issues with the wall, it is worth getting a professional assessment. Sometimes the gap is a symptom of a bigger problem — like a cabinet that was never properly secured or a wall with foundation movement.
FAQ
How do you fill a gap between a cabinet and a wall?
The best method depends on the gap size. For gaps under 1/4 inch, use acrylic latex caulk applied with a caulking gun, then smooth with a wet finger. For gaps between 1/4 and 1/2 inch, use expanding foam or thin trim molding. For gaps over 1/2 inch, install scribe molding or cabinet filler strips cut to match the gap width. Always measure the gap at multiple points before choosing your method, and prep the surface by cleaning dust and debris first.
Do you need filler between cabinet and wall?
Yes, filling the gap between cabinets and the wall is recommended. Even small gaps collect dust and moisture, allow pests to enter your living space, and create air leaks that reduce energy efficiency. A filled gap also gives your kitchen or bathroom a finished, professional appearance. The only exception is a gap designed as part of the cabinet layout, such as a small reveal line that the manufacturer intended.
What is the best filler for cabinet gaps?
The best filler depends on gap size and cabinet finish. For small gaps under 1/4 inch on painted walls, acrylic latex caulk is the top choice. For stained cabinets with small gaps, use stainable wood filler. For medium gaps from 1/4 to 1 inch, expanding foam or quarter-round molding works well. For large gaps over 1 inch, cabinet filler strips made from matching material provide the most professional result.
What is the 1/3 rule for cabinets?
The 1/3 rule for cabinets refers to a layout guideline that says no single cabinet run should take up more than one-third of the total wall length without a break, such as a window, appliance, or doorway. This rule helps maintain visual balance in the kitchen and prevents long, monotonous stretches of cabinetry. It also relates to filler placement — when cabinets span long walls, filler strips at the ends allow for walls that are not perfectly straight and create clean edges.
Can I leave a gap between my cabinet and wall?
You can leave a small gap, but it is not recommended. Open gaps between cabinets and walls allow dust, grease, and moisture to accumulate in hard-to-clean spaces. They also provide entry points for insects and create air leaks that reduce energy efficiency in your home. Even a quick bead of caulk is better than leaving the gap open, and it takes only minutes to apply.
How do I fill a gap between cabinets and the ceiling?
Gaps between the top of wall cabinets and the ceiling follow the same principles. For small gaps under 1/4 inch, caulk works. For medium gaps, use crown molding or a soffit board to close the space. For large gaps, consider building a filler panel or installing decorative trim that spans from the cabinet top to the ceiling. Crown molding is the most popular solution because it hides uneven ceiling lines while adding architectural detail.
Wrapping Up – Filling Gaps Between Cabinets and Walls
Learning how to fill a gap between cabinets and the wall comes down to matching the right method to the right gap size. Measure first, pick your approach based on width, and follow the step-by-step process for that method. Small gaps under 1/4 inch need caulk or wood filler. Medium gaps from 1/4 to 1 inch call for expanding foam or trim molding. Large gaps and uneven walls require scribe molding or cabinet filler strips for a proper fit.
Most of these fixes are well within reach for a DIYer with basic tools and a free afternoon. The materials are affordable and available at any home improvement store. Start with the smallest gap in your kitchen or bathroom to build confidence, then work your way through the rest. The difference between a gap-filled kitchen and one with open spaces is immediately noticeable — and you will appreciate the cleaner look every time you walk into the room.