
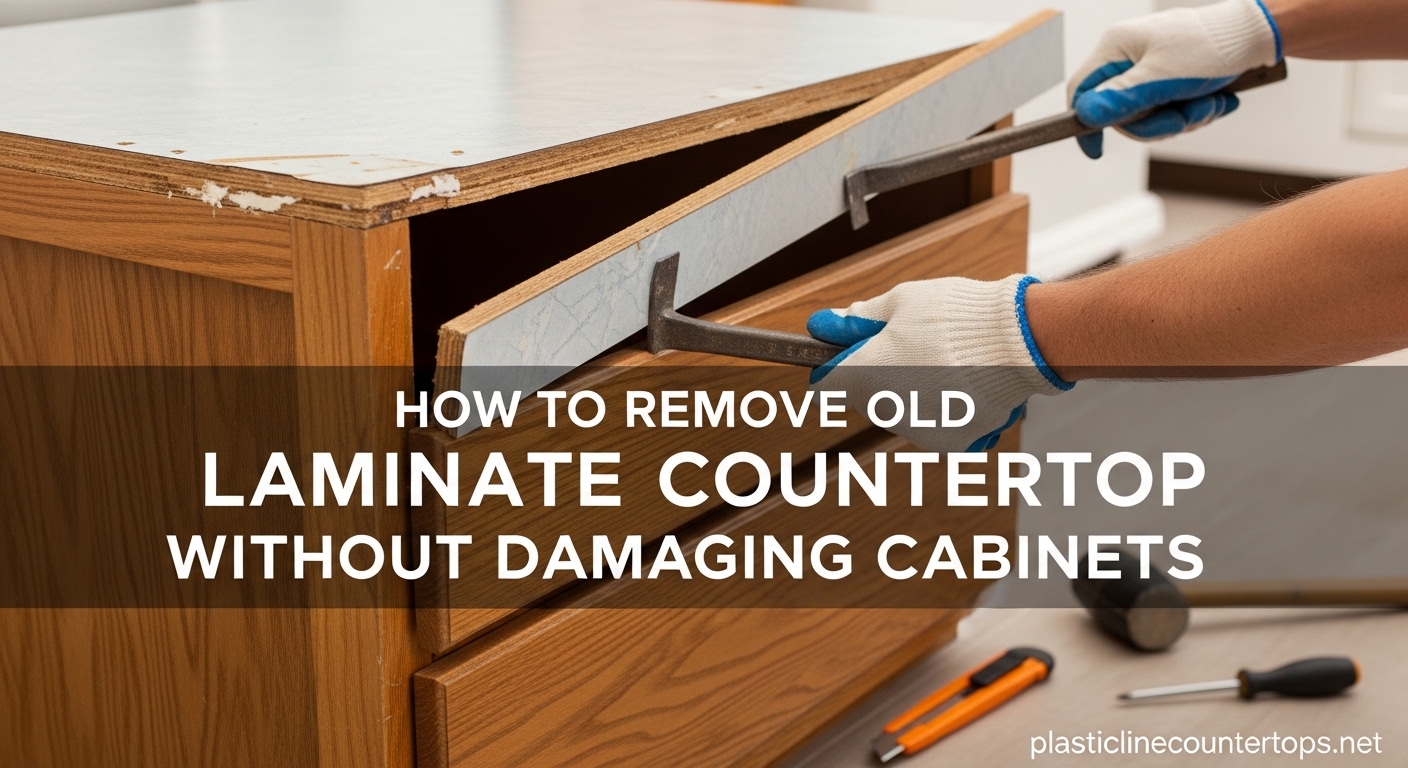
Removing an old laminate countertop without damaging the cabinets underneath is one of those kitchen remodel tasks that sounds simple until you actually start doing it. I have helped friends and family tackle this exact project more than a dozen times, and I can tell you that the difference between a smooth removal and a costly cabinet repair comes down to patience and the right technique. If you are planning a kitchen upgrade and want to preserve your existing cabinets, learning how to remove old laminate countertop without damaging cabinets will save you thousands of dollars in unnecessary cabinet replacement.
The good news is that laminate countertops are among the easiest to remove compared to granite, quartz, or tile. They are lightweight, typically held in place with a combination of screws, brackets, and adhesive, and one or two people can handle the entire job in a single afternoon. The trick is knowing exactly how your countertop is attached and working methodically rather than forcing anything.
Before you start, be aware: This project involves sharp tools, potential exposure to old adhesive chemicals, and working near plumbing and electrical connections. Wear safety glasses and work gloves throughout the process. If your home was built before 1980, consider having the adhesive tested for hazardous materials before disturbing it.
Table of Contents
What You Need to Know Before Starting
Before diving into the removal process, it helps to understand what you are up against. Most laminate countertop removal jobs take between 2 and 4 hours for a standard kitchen, assuming you have your tools ready and a helper on hand. The difficulty level is moderate, meaning a reasonably handy homeowner can handle it without professional help.
That said, there are situations where calling a professional makes more sense. If your countertops contain asbestos (common in homes built before 1980), if you discover mold or water damage inside the cabinets, or if the laminate has been attached with an industrial-strength adhesive that refuses to budge, a professional countertop removal service will cost between $300 and $800 depending on your kitchen size and your location.
Doing it yourself costs almost nothing beyond the tools you likely already own or can borrow. The main investment is your time and patience. I have seen homeowners rush this job and end up cracking cabinet face frames or tearing off cabinet veneer, turning a free DIY project into a $500 cabinet repair bill.
Tools and Materials Needed
Having the right tools ready before you start will make the entire process smoother and faster. I recommend gathering everything on this list before touching the countertop. Nothing slows down a project more than stopping halfway through to search for a specific tool.
Essential Tools
- Utility knife with fresh blades for scoring caulk and paint lines
- Putty knife (stiff 2-inch blade) for separating adhesive bonds
- Phillips and flathead screwdrivers or a power drill with screw bits
- Pry bar (small 12-inch crowbar) for gentle leverage
- Adjustable wrench for disconnecting plumbing supply lines
- Bucket and towels for catching residual water in pipes
Helpful but Optional Tools
- Heat gun for softening stubborn adhesive bonds
- Oscillating multi-tool for cutting through tight adhesive seams
- Stiff drywall knife or scraper for aggressive glue lines
- Flashlight or headlamp for seeing inside dark cabinets
- Painter’s tape for protecting cabinet surfaces from scratches
Safety and Protection Gear
- Safety glasses or goggles
- Work gloves (nitrile or leather)
- Dust mask or respirator
- Drop cloths or old towels for floor protection
One item I always stress having on hand is a stiff scraper or drywall knife. Forum discussions on Reddit’s HomeImprovement community consistently confirm that a stiff drywall knife driven between the countertop and cabinet at the glue line can release the bond in under a minute. It is the single most effective tool for this specific job.
How Laminate Countertops Are Attached to Cabinets
Understanding how your countertop is fastened is the key to removing it without damage. Laminate countertops attach to base cabinets using one or more of four common methods, and most installations use a combination of several of them.
Screws from inside the cabinet: This is the most common method. Builders drive screws upward through the inside top of the cabinet frame directly into the particleboard substrate of the laminate countertop. You will usually find these screws along the front and back rails inside each cabinet, often hidden behind the upper shelf or near the top of the cabinet box.
L-brackets and metal clips: Metal L-shaped brackets get screwed to the cabinet frame on one side and to the countertop on the other. These are sometimes used in addition to screws, especially on longer countertop runs where extra support is needed. They are usually visible inside the cabinet along the top edge.
Construction adhesive: Many installers apply construction adhesive (like Liquid Nails) between the cabinet tops and the laminate countertop substrate. This creates a very strong bond that requires careful separation with a putty knife or scraper. This is the attachment method that causes the most anxiety for homeowners, but it is manageable with the right technique.
Caulk along the backsplash and wall: A bead of caulk seals the gap between the countertop backsplash and the wall, and another bead often runs along the underside edge where the countertop meets the cabinet face frame. This caulk needs to be scored with a utility knife before any prying begins, or you risk pulling paint, drywall paper, or cabinet veneer off with it.
Take a flashlight and look inside every cabinet before you start. Make a mental note of where every screw, bracket, and visible adhesive blob is located. This five-minute inspection will save you a lot of guesswork during removal.
How to Remove Old Laminate Countertop Without Damaging Cabinets: Step-by-Step
This is the complete step-by-step process for laminate countertop removal. Follow these steps in order and work slowly. Rushing is the number one cause of cabinet damage during this project.
Step 1: Shut Off Water and Disconnect Plumbing
Turn off the water supply valves under the sink. If your home does not have individual shut-off valves under the sink, turn off the main water supply to the house. Place a bucket under the P-trap (the U-shaped pipe under the sink) and disconnect the trap using your adjustable wrench. Water will spill out, so have towels ready.
Disconnect the supply lines from the shut-off valves and from the faucet tailpieces. If you have a dishwasher, disconnect its water supply line as well. Tag or label each line so reconnection is easier later. If there is a garbage disposal, unplug it from the outlet under the sink.
Step 2: Clear the Workspace and Protect Your Cabinets
Remove everything from the countertop surface and from inside the cabinets underneath. Lay drop cloths on the floor to catch debris and adhesive chunks. Apply painter’s tape along the top edges of exposed cabinet face frames to protect the finish from accidental scratches while you work inside the cabinets.
Clear at least 4 feet of open floor space near the countertop so you have room to set the removed sections down. If your countertop is one continuous piece, plan your exit path to the door ahead of time. Laminate sections can be surprisingly bulky to maneuver through doorways.
Step 3: Remove Drawers and Cabinet Doors for Access
Pull out all drawers from the base cabinets and set them aside. Removing drawers gives you unobstructed access to the interior of each cabinet, where mounting screws and brackets hide. In many kitchens, screws are tucked behind the drawer slides or inside the back of the cabinet where you cannot see them with drawers in place.
If your cabinet doors swing inward and block access to the upper interior of the cabinet box, remove the doors by unscrewing the hinge screws. This takes about 30 seconds per door and makes the rest of the job far easier.
Step 4: Score All Caulk Lines with a Utility Knife
This step is critical and often skipped by first-timers. Run a fresh utility knife blade along every caulk line you can find: where the backsplash meets the wall, where the countertop edge meets the cabinet face frame, and along any seams where countertop sections join together. Score deeply enough to cut completely through the caulk bead.
If you skip this step, the caulk will act like glue and pull paint off the wall or tear veneer off the cabinet face when you start prying. I made this mistake once on my first removal job and spent an hour patching torn drywall paper. Score the caulk twice if needed to make sure it is fully severed.
Step 5: Remove the Sink
If you have a drop-in (top-mount) sink, use your utility knife to cut the caulk seal around the rim, then lift the sink out from above. Most drop-in sinks are held by clips underneath that you can release with a screwdriver. Once the clips are undone and the caulk is cut, the sink lifts straight up and out.
For undermount sinks, you will need to unscrew the mounting brackets from underneath the countertop while someone supports the sink from below. Undermount sinks are heavier, so do not attempt this alone. Set the sink aside carefully after removal.
Step 6: Locate and Remove All Mounting Screws
Shine your flashlight inside each cabinet and look up at the top interior surface. You are looking for screws driven upward through the cabinet frame into the countertop substrate. These are typically Phillips-head screws, and there are usually 2 to 4 per cabinet.
Unscrew every one of them with your screwdriver or power drill. If a screw spins freely without backing out, it may have stripped the particleboard above. In that case, use a pair of locking pliers to grip the screw head while turning it. Do not leave any screws in place, even if they seem loose. A forgotten screw will bind the countertop and cause damage when you try to lift it.
Step 7: Detach L-Brackets and Metal Clips
Check for metal L-brackets along the top edges inside the cabinets. These brackets have one side screwed to the cabinet and the other side screwed into the countertop. Remove both screws from each bracket and set the brackets aside if you plan to reuse them with the new countertop.
Some installations use metal corner clips instead of full brackets. These are small angled pieces of metal that grab the cabinet frame. Remove the screws from these clips the same way. Check the end cabinets especially carefully, as builders often use extra fasteners at the ends and at joints between countertop sections.
Step 8: Break the Adhesive Bond
This is the step where most cabinet damage happens if you are not careful. After all screws and brackets are removed, the only thing holding the countertop down is adhesive. Slide your stiff putty knife or drywall knife between the top of the cabinet frame and the bottom of the laminate countertop at the glue line.
Tap the handle of your putty knife gently with a hammer to drive the blade between the two surfaces. Work the blade back and forth along the length of each cabinet, breaking the adhesive bond as you go. Do not pry upward with excessive force. Let the blade do the cutting work.
If the adhesive is extremely stubborn, use a heat gun on a medium setting to warm the glue line before scraping. Move the heat gun continuously so you do not scorch the laminate or the cabinet surface. The softened adhesive will release much more easily with the scraper once it is warm.
As community members on Houzz confirm, driving a stiff scraper between the cabinet and the countertop at the glue line can release the bond in less than a minute with no heat needed. The key is using a genuinely stiff blade, not a flexible putty knife.
Step 9: Gently Pry the Countertop Loose
Once the adhesive bond is broken along all cabinet contact points, test whether the countertop lifts freely. If it still feels stuck somewhere, stop and check for a fastener you missed. Do not force it.
If the countertop is free, use your small pry bar to gently lift one end. Place a thin piece of scrap wood between the pry bar and the cabinet surface to avoid denting the cabinet. Work from one end of the countertop run to the other, lifting gradually. Never pry from the middle, as this can cause the laminate to crack or bow.
Step 10: Lift and Remove the Countertop
Laminate countertops are light enough that one strong person can usually handle a small section, but for anything longer than 6 feet, grab a helper. Lift the countertop straight up and away from the cabinets. Pulling it at an angle can snag it on cabinet edges or wall corners.
If your countertop is one continuous L-shaped or U-shaped piece, you may need to cut it into sections for easier removal. Use a circular saw or jigsaw to cut through the substrate at a seam or at a convenient point. Cut from the underside to avoid chipping the laminate surface. Set each section aside on your drop cloths.
Congratulations. You have successfully removed your laminate countertop without damaging your cabinets. Now let’s cover the backsplash and adhesive cleanup.
Removing the Backsplash Without Wall Damage
The laminate backsplash attached to your countertop presents a separate challenge because it is usually glued directly to the wall. Removing it without gouging the drywall requires a delicate touch and the same scoring technique you used on the caulk lines.
Start by scoring the paint and caulk along the top edge of the backsplash where it meets the wall. Cut deeply with your utility knife, running the blade along the entire length. Score it twice for good measure. This prevents the wall paint and drywall paper from peeling away with the backsplash.
Slide your putty knife behind the backsplash at one end and work it along the length, tapping gently with a hammer to separate the adhesive. If the backsplash is integrated into the countertop (as most laminate backsplashes are), you will need to separate it from the wall before you can lift the entire countertop assembly away. Work the knife gradually along the full length before attempting to pull the backsplash away from the wall.
For particularly stubborn backsplash adhesive, apply heat from a heat gun set on medium. Keep the gun moving and warm a 6-inch section at a time, then work your putty knife through the softened adhesive. This takes patience but prevents the drywall damage that happens when you pull too hard.
Minor wall damage is common and expected. Small gouges in the drywall can be repaired easily with spackle or joint compound once the backsplash is off. If you plan to install a new tile or stone backsplash, minor wall imperfections will be completely covered anyway.
How to Deal with Stubborn Adhesive
Some laminate countertops are installed with construction adhesive that bonds like nothing else. If you encounter adhesive that refuses to release with a putty knife alone, you have several options that will not damage your cabinets.
Heat gun method: Set your heat gun to medium (around 300 degrees Fahrenheit) and warm the adhesive line for 20 to 30 seconds before scraping. The heat softens most construction adhesives, making them pliable enough to cut through with a scraper. I have used this technique on at least five removals and it works every time on modern adhesives. Never hold the heat gun in one spot for more than a few seconds to avoid damaging the laminate or scorching the cabinet.
Oscillating multi-tool method: If you have an oscillating multi-tool with a scraper blade, it can slice through adhesive bonds quickly and cleanly. Run the blade flat along the top of the cabinet frame at the glue line. The vibration does the work for you with minimal physical effort. This is particularly useful for adhesive that has hardened over many years.
Adhesive remover: For residue that remains after the countertop is off, apply a commercial adhesive remover like Goo Gone or denatured alcohol to the cabinet tops. Let it sit for 10 minutes, then scrape the softened residue away with your putty knife. Test the remover on an inconspicuous area of the cabinet first to make sure it does not damage the finish.
Patience method: Sometimes the best approach is simply working your scraper in small increments along the glue line, tapping with a hammer between each advance. The Reddit HomeImprovement community swears by this approach, and multiple users report that a stiff drywall knife driven steadily along the bond line pops the countertop free in under a minute with no special tools or heat required.
Common Mistakes to Avoid
Over the many countertop removals I have done or helped with, these are the mistakes I see people make most often. Each one can result in cabinet damage that costs more to fix than hiring a professional would have cost in the first place.
Prying too hard, too fast: This is the single biggest mistake. When the countertop feels stuck, the instinct is to yank harder on the pry bar. Resist this urge. Excessive prying will crack cabinet face frames, split cabinet sides, or tear off the cabinet’s top rail. If the countertop is not coming free, stop and check for a missed screw or uncut adhesive section.
Forgetting to disconnect utilities: Skipping the water shut-off step leads to flooding when you pull the sink out. Forgetting to unplug the garbage disposal means you are yanking on an electrical cord. Always disconnect all utilities before starting any physical removal work.
Missing hidden fasteners: Screws hide behind drawer slides, inside corner cabinets, and behind the back rail of the cabinet box. Shine a flashlight into every corner of every cabinet and run your hand along the top interior surface. A single forgotten screw can hold the entire countertop captive.
Not scoring caulk before prying: Caulk that is not scored will grab onto wall paint, cabinet finish, and drywall paper. I have seen homeowners pull off a 3-foot strip of wall paint in one piece because they skipped the utility knife step. Take the extra two minutes to score every caulk line.
Lifting without help on large sections: Even though laminate is lighter than stone, a 10-foot countertop section with an integrated backsplash is awkward and surprisingly heavy. Dropping it can damage the floor, the countertop (if you hoped to reuse it), or your back. Always have a second person for anything longer than 6 feet.
Using a crowbar directly against the cabinet surface: If you must use a pry bar for leverage, always place a scrap piece of wood between the tool and the cabinet. Metal directly against wood or veneer will leave dents, gouges, and scratches.
Cleaning Up and Preparing Cabinets for New Countertops
Once the old laminate countertop is off, take time to properly prepare the cabinet tops for the new installation. This prep work ensures a solid bond and a level surface for whatever countertop material you choose next.
Start by scraping off all remaining adhesive from the top edges of the cabinet frames. Use your putty knife or scraper to remove every trace of old glue. If the adhesive is stubborn, use adhesive remover as described earlier. Any adhesive left on the cabinet tops will prevent the new countertop from sitting flat and level.
Inspect the cabinet tops for damage. Look for cracked rails, split wood, loose joints, or water damage that may have been hidden under the old countertop. Repair any issues before the new countertop goes on. Small cracks can be filled with wood filler, and loose joints can be reinforced with corner braces and screws.
Sand the cabinet tops smooth with medium-grit sandpaper (120 grit works well) to create a clean surface for the new adhesive. Wipe away all dust with a damp cloth. Check that the cabinet tops are level using a 2-foot or 4-foot level. If any section is more than 1/8 inch out of level, shim it with thin wood shims before the new countertop is installed.
Finally, vacuum out the interior of each cabinet to remove sawdust, adhesive chunks, and debris that fell inside during the removal process. Your cabinets are now clean, level, and ready for the new countertop installation.
FAQ
How to remove laminate countertops without damaging cabinets?
To remove laminate countertops without damaging cabinets, first shut off water and disconnect plumbing. Remove all drawers and cabinet doors for access. Score all caulk lines with a utility knife. Remove mounting screws from inside the cabinets, detach any L-brackets or clips, then break the adhesive bond using a stiff putty knife tapped gently with a hammer along the glue line. Work slowly from one end to the other, prying gently with a small pry bar. Never force anything—if it feels stuck, check for a missed fastener.
Will removing countertops damage cabinets?
No, removing countertops will not damage cabinets if done correctly. The key is removing all fasteners first (screws, brackets, clips), scoring all caulk lines with a utility knife before prying, and using gentle pressure with a putty knife at the adhesive line. Cabinet damage almost always happens from rushing the job, prying too hard, or missing hidden screws that bind the countertop.
Can you change countertops without ruining cabinets?
Yes, you can absolutely change countertops without ruining cabinets. Laminate countertops in particular are designed to be removable. They are held by screws, brackets, and adhesive—all of which can be released without harming the cabinet structure. Thousands of homeowners do this every year as part of kitchen remodels where the cabinets are in good condition but the countertops need updating.
What tools do I need to remove a laminate countertop?
You need a utility knife with fresh blades for scoring caulk, a stiff putty knife or drywall knife for breaking adhesive bonds, Phillips and flathead screwdrivers for removing mounting screws, a small pry bar for gentle leverage, an adjustable wrench for disconnecting plumbing, and a bucket with towels for water drainage. Optional but helpful tools include a heat gun for stubborn adhesive and an oscillating multi-tool with a scraper blade.
How long does it take to remove a laminate countertop?
Removing a laminate countertop typically takes 2 to 4 hours for a standard kitchen. This includes time to disconnect plumbing, remove all fasteners, break the adhesive bond, and lift the countertop off. If the adhesive is very stubborn or you encounter unexpected fasteners, plan for an extra hour. Having a helper can cut the total time by about 30 percent.
How do you remove a countertop that is glued on?
To remove a glued-on countertop, first remove all screws and brackets. Then drive a stiff putty knife or drywall scraper between the cabinet top and the countertop at the glue line. Tap the handle gently with a hammer to advance the blade. If the adhesive is very strong, use a heat gun on medium setting to warm and soften the glue before scraping. Work along the entire length of each cabinet until the bond is fully released, then lift the countertop away.
Conclusion
Learning how to remove old laminate countertop without damaging cabinets comes down to a simple formula: prepare thoroughly, remove all fasteners first, score every caulk line, and break the adhesive bond gently with patience rather than force. The process takes most homeowners a single afternoon with basic hand tools.
Your cabinets are the most expensive part of your kitchen to replace, so protecting them during countertop removal is worth the extra time and care. Every mistake I described in the common mistakes section is preventable with the step-by-step approach outlined above.
Once the old laminate is off and the cabinet tops are cleaned and leveled, you are ready for the exciting part: installing your new countertop. Whether you are upgrading to quartz, granite, butcher block, or a fresh laminate surface, your preserved cabinets will provide a solid foundation for years to come.