
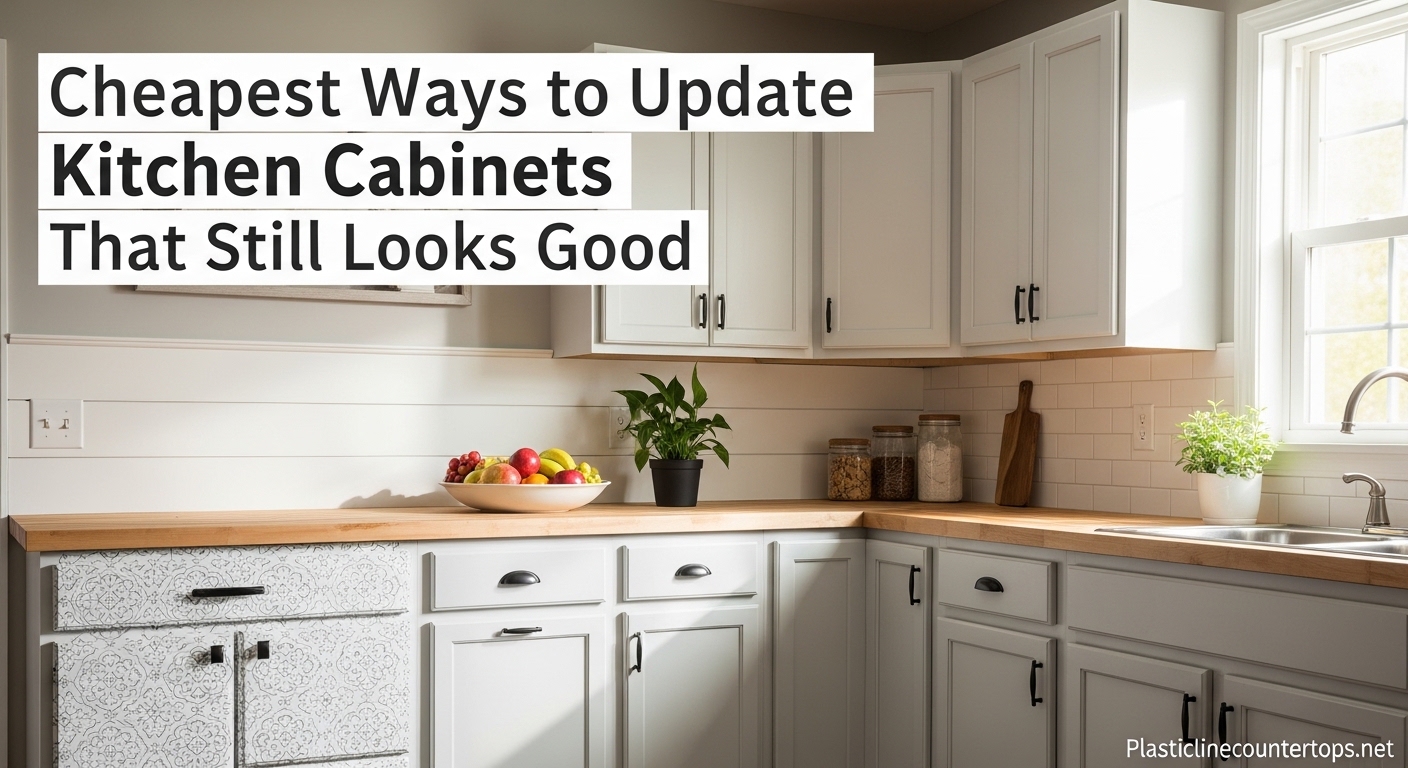
If your kitchen cabinets look like they belong in a different decade, you are not alone. I have been there, staring at dated oak doors and honey-stained trim, wondering how much a full replacement would set me back. The answer is usually somewhere between $5,000 and $15,000 for a complete cabinet replacement, which is enough to make anyone pause. But here is the good news: the cheapest way to update kitchen cabinets that still looks good does not involve ripping anything out or spending anywhere close to that amount.
Our team spent weeks digging through real homeowner projects, forum discussions on r/HomeImprovement and r/DIYUK, and dozens of DIY tutorials to find which budget methods actually deliver results worth showing off. We talked to people who spent as little as $20 on their update and others who invested $500. The common thread? Every one of them transformed their kitchen without a single contractor estimate.
In this guide, I will walk you through the seven most affordable ways to transform your cabinets, complete with cost estimates, difficulty ratings, time commitments, and honest assessments from people who have actually done the work. Whether you own your home or rent, whether your budget is $50 or $500, whether you have a free Saturday or a free weekend, you will find an approach that fits your situation perfectly.
One thing I want to be upfront about: the methods here are ordered roughly from cheapest to most impactful. But the real magic happens when you combine two or three of them together. A hardware swap plus fresh paint plus new lighting can make a $20,000 kitchen renovation look unnecessary. I will get into that combination strategy at the end.
Table of Contents
Quick Overview: 7 Cheapest Ways to Update Kitchen Cabinets
Here is a fast look at the methods we cover, ranked roughly from lowest cost to highest impact. I wanted to put this list up front so you can zero in on what works for your budget and skill level. Every method below has been tested by real homeowners and verified through forum discussions and DIY communities.
- Paint your cabinets — $50 to $200 in materials — biggest visual transformation possible — 1 to 2 weekends
- Swap out hardware — $30 to $200 — instant style change with minimal effort — 1 to 2 hours
- Add crown molding or trim — $40 to $150 — makes builder-grade cabinets look custom — 1 day
- Apply contact paper or vinyl wrap — $20 to $100 — great for renters and temporary updates — 2 to 4 hours
- Remove doors for open shelving — $0 to $50 — trendy and completely free if you skip extras — 1 to 2 hours
- Install glass door inserts — $100 to $300 — elevates the look significantly — 1 to 3 days
- Upgrade under-cabinet lighting — $20 to $150 — adds a polished, high-end feel — 30 minutes to 4 hours
You can combine several of these methods for a full kitchen refresh that still keeps your total well under $500. Let me break down each one in detail so you can decide which approach makes the most sense for your kitchen and your skill level.
Paint Your Cabinets (The Most Affordable Transformation)
If there is one method that consistently delivers the biggest visual payoff for the lowest cost, it is painting. A fresh coat of paint can take cabinets from drab and dated to crisp and modern in a single weekend. The materials typically run between $50 and $200 depending on the size of your kitchen and the paint quality you choose. That is a fraction of what refacing or replacing would cost.
I have seen kitchen transformations where the only change was cabinet paint, and the room looked like it had been completely gutted and redone. The color shift is that powerful. White paint over dark oak, navy over honey maple, soft sage green over cherry wood — each combination creates an entirely different mood.
What You Need to Get Started
Before you open a single can of paint, the prep work matters more than anything else. I cannot stress this enough. Every experienced DIYer on forums like r/HomeImprovement says the same thing: shortcuts in preparation lead to chipping, peeling, and regret a few months later. The paint itself is only as good as the surface it sits on.
Here is your complete supplies checklist:
- Trisodium phosphate (TSP) or degreaser to cut through years of kitchen grease and grime — this step is non-negotiable
- Sandpaper (120-grit and 220-grit) or a liquid deglosser if you want to skip the dust
- High-quality primer — shellac-based (like Zinsser BIN) or a bonding primer designed for slick surfaces
- Durable cabinet paint — alkyd enamel, acrylic enamel, or a dedicated cabinet paint like Benjamin Moore Advance
- Brush, foam roller, or HVLP sprayer depending on your desired finish quality and budget
- Painter’s tape, drop cloths, and screwdriver for removing hardware and protecting surfaces
- Tack cloths for wiping away sanding dust between coats
Total cost for supplies runs about $50 for a small kitchen with basic tools, up to $200 for a larger kitchen where you invest in quality primer and paint. The paint is not the place to save money. Budget paint on kitchen cabinets will cost you more in the long run when it starts chipping and you have to redo the whole project.
Step-by-Step Painting Process
Step 1: Remove all hardware and doors. Take off the knobs, pulls, hinges, and doors. Label each door and its corresponding cabinet box with numbered blue painter’s tape so reassembly is painless. I use a simple numbering system: door 1 goes to cabinet 1, door 2 to cabinet 2, and so on. This is one of those steps people skip and then regret when doors end up in the wrong spots or hinges do not line up properly.
Step 2: Clean every surface thoroughly. Wipe down all doors, drawer fronts, and cabinet boxes with TSP or a strong degreaser. Kitchen cabinets collect a surprising amount of invisible grease, especially near the stove, and paint will not adhere to it no matter how good the primer is. Rinse with a damp cloth and let everything dry completely before moving on.
Step 3: Sand the surfaces. Lightly sand with 120-grit sandpaper to scuff the existing finish. You do not need to sand down to bare wood. You just need enough tooth for the primer to grip the surface. If you hate sanding dust (and most people do), a liquid deglosser like Klean-Strip works as an alternative on most surfaces. It chemically etches the finish so primer can bond to it. Wipe away all dust with a tack cloth after sanding.
Step 4: Prime everything. Apply one solid coat of quality primer. Shellac-based primers like Zinsser BIN dry in about 45 minutes and adhere to almost anything, including laminate and glossy surfaces. The trade-off is the strong odor, so ventilate well. Water-based bonding primers are more pleasant to work with and clean up easily with soap and water. Let the primer dry fully according to the manufacturer’s instructions before applying paint.
Step 5: Paint in thin, even coats. This is where your tool choice really matters. Forum users consistently report that HVLP sprayers produce the smoothest, most professional-looking finish. If you do not have access to a sprayer (you can rent one for about $50 to $80 per day), a high-density foam roller followed by light brush strokes on edges works surprisingly well. Apply two to three thin coats, waiting for full drying time between each one. Thick coats are the number one cause of drips, brush marks, and uneven finish.
Step 6: Reassemble and enjoy. Wait at least 24 to 48 hours before reattaching doors and hardware. The paint may feel dry to the touch sooner, but it needs time to harden properly. Longer cure times of up to a full week give the paint maximum hardness and scratch resistance, which is especially important on high-traffic cabinets near the stove and sink.
Choosing the Right Paint Color
White and off-white remain the most popular cabinet colors because they brighten the kitchen and never go out of style. Colors like Benjamin Moore Simply White or Sherwin-Williams Alabaster give a warm, inviting look that works with almost any countertop and backsplash combination.
But if white feels too safe, consider sage green, navy blue, or a warm charcoal gray for a bold but sophisticated look. Two-tone kitchens with darker lower cabinets and lighter upper cabinets have been trending strongly for the past few years and add visual depth without any extra cost. This is a designer trick that costs exactly zero additional dollars but makes the kitchen look like it was professionally planned.
For wood cabinets that you want to update without fully painting over the grain, a gel stain like General Finishes Java Gel Stain can refresh the tone while keeping the natural wood texture visible. This is a great middle ground if you like the warmth of wood but want a richer, more modern stain color. The process is similar to painting but typically requires fewer coats.
Painting Tips from Real Homeowners
People who have actually painted their cabinets consistently share a few hard-won lessons on forums and in Facebook DIY groups. First, do not rush the drying time between coats. Impatience is the enemy of a smooth finish. Second, invest in good paint rather than the cheapest option on the shelf. The price difference between budget paint and quality cabinet paint is maybe $20 to $30 per gallon, but the durability difference is measured in years.
Third, practice your technique on the inside of a door or a scrap piece of wood before tackling the visible surfaces. This is especially important if you are using a sprayer for the first time. Fourth, and this one surprises people, the right primer makes more difference than the paint itself when it comes to long-term durability. Skimping on primer is the most common mistake that leads to peeling cabinets.
Swap Out Dated Hardware for an Instant Refresh
This might be the single easiest update on the entire list, and possibly the best return on investment. Changing out your cabinet knobs and pulls takes maybe an hour of your time and costs as little as $30 to $200 depending on how many cabinets you have and the style you pick. Yet the visual impact is immediate and unmistakable.
Think of hardware as jewelry for your cabinets. Those shiny brass pulls from 1995 or the cheap plastic knobs from a builder-grade install are dragging your whole kitchen down, even if you never noticed it. Replacing them with sleek matte black pulls, warm brushed brass knobs, or polished chrome options can make the same cabinets feel like they belong in a different (much nicer) kitchen.
Forum users consistently report that hardware is one of the first things people notice when they walk into a kitchen. It is also one of the cheapest things to change. At $2 to $10 per pull, even a kitchen with 30 cabinet doors can be fully updated for under $300.
How to Choose New Hardware
Start by deciding on a finish, because this sets the tone for the whole kitchen. Matte black and brushed brass are the most popular choices right now because they work with nearly every cabinet color and style, from farmhouse to modern. Satin nickel and polished chrome remain classic options that look good everywhere. If you want to make a statement, consider leather pulls, ceramic knobs, or even glass knobs for a vintage touch.
For style, bar pulls are the cleanest modern look and the easiest to install because they only require two screws. Cup pulls work well on drawers for a farmhouse or transitional feel. Round knobs are timeless and work everywhere, especially on upper cabinet doors. Mix knobs on doors with pulls on drawers for a designer look that costs no extra money but looks intentionally planned.
One design tip from professional kitchen designers: match your cabinet hardware finish to your faucet and light fixtures. This creates a cohesive look throughout the kitchen without any extra cost. If your faucet is brushed nickel, choose brushed nickel pulls. If you have a matte black faucet, matte black pulls will tie everything together beautifully.
Handling Mismatched Holes
This is the biggest pain point people run into, and it comes up constantly in DIY forums. If your old hardware has holes that do not match the spacing on your new pulls, you have a few solid options:
- Fill the old holes with wood filler, sand smooth, and drill new ones. Touch up with paint or a furniture marker. This takes extra time but gives the cleanest result.
- Choose a backplate that covers the old holes while providing a mounting point for new hardware. This is the fastest fix and adds a decorative element. Backplates cost about $2 to $5 each.
- Match your new hardware spacing to the existing holes. Measure carefully before you buy. This is the easiest solution if you plan ahead.
Standard pull spacing in the US is 3 inches (often labeled as 3-inch or 76mm center-to-center). Most big-box home improvement stores like Home Depot and Lowe’s carry pulls in this standard size, making it easy to swap without drilling new holes. European cabinets sometimes use different spacing, so measure before you shop.
Soft-Close Hinges: Worth the Upgrade
While you are already swapping out hardware, consider upgrading to soft-close hinges and drawer slides. They cost about $3 to $8 per hinge and make a surprisingly big difference in how your kitchen feels day to day. No more slamming doors. No more drawers banging shut. The gentle, controlled close feels premium and modern, and it protects your cabinet frames from impact damage over time.
Installation is usually as simple as unscrewing the old hinge and screwing in the new one, though you may need to adjust the positioning slightly for proper door alignment. Soft-close adapters also exist for about $5 each if you want to keep your existing hinges but add the soft-close feature. These attach directly to the cabinet frame and catch the door as it closes.
Add Crown Molding or Trim for a Custom Look
One of the telltale signs of builder-grade cabinets is a flat, unfinished top edge where the cabinet meets the ceiling, or a visible gap between the top of the cabinet and the ceiling. Adding crown molding between your upper cabinets and the ceiling transforms that awkward gap into something that looks custom-built and intentional. The materials typically cost between $40 and $150 depending on the size of your kitchen.
This update tricks the eye into thinking your cabinets extend all the way to the ceiling, which is a hallmark of high-end kitchen design. It also gives you a little extra storage space on top of the upper cabinets if you have an open gap there, and it eliminates the dust-collecting ledge that nobody enjoys cleaning.
Even if your cabinets do not reach the ceiling, a simple piece of flat trim or quarter-round molding along the top edge adds a finished look that makes the whole kitchen feel more polished. The difference between a raw cabinet edge and one finished with molding is subtle until you see them side by side, and then it is dramatic.
What You Need
- MDF or paint-grade crown molding from your local home improvement store — MDF is affordable and takes paint beautifully
- Finishing nails or construction adhesive (adhesive like Liquid Nails is easier for beginners and holds well)
- Caulk and wood filler to fill gaps between molding and cabinet, and to hide nail holes
- Miter saw or coping saw for cutting angles (a miter box with a hand saw works for small kitchens)
- Paint to match your cabinets for a seamless, built-in appearance
- Measuring tape and pencil for accurate cuts
Installation Steps
Step 1: Measure your cabinet runs. Measure the length of each section where molding will go along the top of your upper cabinets. Add about 10 percent extra for mistakes, angled cuts, and waste. It is always better to have a little too much than to come up short halfway through.
Step 2: Cut your molding pieces. Inside corners are typically cut at 45-degree angles using a miter saw. If you are using a miter saw, this is straightforward once you set the angle. A coping saw lets you cope the joints for a tighter fit at inside corners, but it takes more practice. For outside corners, cut the complementary 45-degree angle in the opposite direction.
Step 3: Attach the molding. Apply construction adhesive to the back of the molding and press it into place against the cabinet top and the wall or ceiling. Hold it for about 30 seconds until the adhesive grabs. You can reinforce with finishing nails for a more secure hold that will not shift over time. Some people attach a small mounting strip (called a cleat) to the top of the cabinet first, then nail the molding to that cleat for maximum stability.
Step 4: Fill and finish. Fill any nail holes with wood filler and let it dry. Run a thin bead of caulk along the top and bottom edges where the molding meets the cabinet and ceiling. This creates that seamless, built-in look. Once the caulk and filler are dry, paint the molding to match your cabinets for a result that looks like it was always part of the original installation.
Simpler Trim Options
If crown molding feels intimidating or your cabinets sit flush against the ceiling, there are simpler trim upgrades that still add real character. A flat piece of trim or picture molding applied to the center panel of a plain flat cabinet door creates a faux shaker style. This is an extremely popular DIY trick that costs just a few dollars per door and completely changes the profile of flat or dated cabinet fronts.
The process is simple: cut trim pieces to frame the center panel of each door, glue and nail them in place, fill the nail holes, and paint. The result looks like raised-panel shaker cabinets at a fraction of the cost of actual door replacements. People on DIY forums rave about this transformation because it takes builder-grade flat doors and makes them look custom.
Use Contact Paper or Vinyl Wrap for a Temporary Update
This is one of the most under-discussed options out there, and it fills a very real need that most competitors barely mention. If you are renting, on a tight timeline, or just want to test a new look before committing to paint, contact paper and peel-and-stick vinyl wraps can give your cabinets a fresh appearance with zero permanent changes. Costs range from $20 to $100 depending on how much surface area you need to cover.
The variety available now is surprisingly good. You can find vinyl wraps that mimic white shaker panels, dark wood grains, marble textures, solid matte colors, brushed metal, and even concrete finishes. Some products are specifically designed for kitchen cabinet applications and are thicker and more durable than standard contact paper you might remember from your grandmother’s pantry shelves.
How to Apply Vinyl Wrap
Step 1: Clean and dry the surfaces. Just like painting, surface preparation is absolutely critical. Remove all grease, grime, and residue with a degreaser. The surface must be completely dry and smooth before applying the wrap. Any speck of dirt or grease will create a visible bump under the vinyl.
Step 2: Measure and cut. Measure each door and drawer front carefully, measuring twice to be safe. Cut pieces slightly larger than needed so you can trim the excess for a clean edge. Having a little overhang is much better than coming up short.
Step 3: Peel and stick slowly. Peel back just a few inches of the backing, line up the top edge with the cabinet door, and press it down firmly. Slowly peel the rest of the backing while smoothing the wrap down with a squeegee, credit card, or the edge of a ruler to push out air bubbles as you go. Work from the center outward in long, even strokes.
Step 4: Trim the edges. Use a sharp utility knife with a fresh blade to trim excess material around the edges. Score lightly along the edge of the cabinet door for a clean, straight cut. A dull blade will tear the vinyl instead of cutting it cleanly.
Honest Pros and Cons
The biggest advantage of vinyl wrap is reversibility. When you are ready to move out or change the look, you just peel it off. It also requires no special tools, no sanding, and no drying time. You can wrap an entire kitchen in a single afternoon.
The downside, and I want to be completely honest about this, is durability. Forum users from humid climates consistently report that contact paper can bubble and peel over time when exposed to moisture and heat near the stove or dishwasher. One user from Florida said her vinyl wrap started lifting at the edges within eight months on the cabinet next to the dishwasher. Another user in a dry climate reported her wrap still looked perfect after two years.
This method works best on cabinet doors that are away from direct water and heat sources. It is also better suited for upper cabinets than lower ones, which get more physical wear and tear from daily use. If you decide to go this route, choose a thicker vinyl product specifically rated for cabinets rather than the cheapest contact paper you can find. The price difference is small but the durability difference is significant.
Best Use Cases for Vinyl Wrap
- Renters who cannot make permanent changes to their cabinets
- Testing a color or style before committing to paint
- Updating a rental property kitchen between tenants
- Cabinets with flat surfaces (textured cabinets are much harder to wrap cleanly)
- Laminate or thermofoil cabinets that are difficult or impossible to paint
- A quick refresh before listing a house for sale
For thermofoil cabinets specifically, which have a vinyl coating that can peel and look terrible over time, wrapping over the damaged surface is one of the few DIY fixes that actually works. Painting thermofoil is risky because the surface does not accept paint well, but a good quality vinyl wrap can adhere to it and hide the damage completely.
Remove Cabinet Doors for Open Shelving
Here is a method that can cost you absolutely nothing. Removing the doors from your upper cabinets converts them into open shelves, which is one of the most popular kitchen design trends of the past several years. The look is airy, open, and works especially well in farmhouse, modern, and transitional style kitchens. It makes a small kitchen feel larger and a dark kitchen feel brighter.
The process is as simple as it sounds. Take off the doors, unscrew the hinges, fill the screw holes with wood filler or a paint touch-up pen, and paint or wallpaper the interior of the cabinet to give it a finished appearance. That is it. You have open shelving for free.
That said, you do not have to remove every upper door. One of the most effective approaches is to remove just two or three doors in a strategic location, like the cabinets flanking the range hood or a single row of uppers on one side of the kitchen. This gives you the open look without committing the entire kitchen to exposed shelving.
Making Open Shelving Work
The biggest complaint I see on forums is that open shelving looks cluttered. This is a completely valid concern. The trick is to be very selective about what goes on the open shelves. Use your open cabinets to display matching dishware, glass jars filled with dry goods like pasta and rice, a few attractive cookbooks, small potted herbs, and a handful of decorative pieces.
Remove anything mismatched, chipped, or used daily but not display-worthy. Store those items in the cabinets that still have doors. The open shelves should look curated and intentional, like a magazine spread, not like a chaotic pantry shelf.
Adding peel-and-stick wallpaper or a fresh coat of paint to the interior back wall of the cabinet gives it a finished, intentional look rather than just looking like a cabinet missing its door. A light color like soft white or pale blue works best to brighten the space. A bold patterned wallpaper on the interior back can add a fun pop of personality. Some people install small LED puck lights inside the upper cabinets for an extra polished touch that also serves as task lighting.
When to Keep the Doors
Open shelving is not for everyone, and honesty matters more than aesthetics here. If you cook frequently with oil and spices, the exposed items will collect grease and dust much faster than you expect. Frequent cooks in small kitchens often regret removing their cabinet doors within weeks. If you do the dishes once a week and your cabinets are currently stuffed to the brim, taking the doors off might create more stress than aesthetic pleasure.
Be honest with yourself about your tidiness habits before committing to this one. The best open shelving belongs to people who enjoy organizing and styling their kitchen items, not people who want to shove everything behind a door and forget about it.
Install Glass Door Inserts to Elevate Your Cabinets
If you want a change that genuinely makes your kitchen look more expensive and designed, glass door inserts are a strong choice. This update involves cutting out the center wood panel of select cabinet doors and replacing it with glass. It costs between $100 and $300 depending on the type of glass, how many doors you convert, and whether you do the work yourself or hire a professional.
You do not need to convert every cabinet door. In fact, the most common and effective approach is to add glass to just a few doors in a cluster, usually the ones flanking the range hood or above the sink area. This creates a focal point and breaks up the solid wall of cabinet fronts, adding visual rhythm and depth to the kitchen.
Glass Type Options
- Clear glass — shows off whatever is inside. Best if you keep things neat and coordinated. Creates an open, airy feel.
- Frosted glass — lets light through but blurs the contents. Great if you want the glass look without the pressure of perfectly arranged shelves.
- Seeded glass — has small bubbles trapped inside that add texture and a vintage feel. Works beautifully in farmhouse, cottage, and traditional kitchens.
- Ribbed or fluted glass — adds a modern, textured element that is trending heavily in kitchen design right now. The vertical ridges catch light in an elegant way.
- Smoky or bronze glass — adds warmth and a slightly moody feel. Works well with dark or wood-toned cabinets.
DIY or Hire It Out
If you are comfortable with a router, you can cut out the center panel yourself and order glass pieces to fit from a local glass shop. The router work requires precision and a steady hand, so practice on a scrap piece of wood or an old cabinet door first. You will need to create a rabbet (a stepped cut) along the inside edge for the glass to sit in.
Many people find it worth the money to hire a local carpenter or glass installer for this project, especially since tempered glass (which is safer and more durable than regular glass) needs to be professionally ordered to exact dimensions anyway. A carpenter might charge $150 to $250 to convert three to four doors, which includes cutting the openings, ordering tempered glass, and installing everything. Given the visual impact, that is a reasonable investment.
One safety note: always use tempered glass for cabinet doors. If tempered glass breaks, it shatters into small, relatively harmless pieces rather than sharp shards. This is especially important in a kitchen where doors get bumped, slammed, and exposed to temperature changes.
Upgrade Under-Cabinet Lighting for a High-End Feel
Lighting is one of those things you do not really notice until it is gone, but when it is done right, it makes the whole kitchen feel dramatically more finished and intentional. Under-cabinet lighting illuminates your countertops for practical task lighting while also creating a warm, layered ambiance that makes the space feel designed rather than thrown together. Costs run from $20 for basic battery-operated strips to $150 for hardwired LED systems.
I genuinely believe that under-cabinet lighting is the most underrated kitchen update on this list. It costs very little, takes minimal effort to install, and the result makes people think your kitchen cost twice what it actually did. It highlights the countertop, the backsplash, and the refreshed cabinets in a way that overhead lighting alone cannot achieve.
Types of Under-Cabinet Lighting
Battery-operated LED strips are the easiest option and perfect for renters. You stick them under the cabinet with adhesive backing and turn them on with a remote control or a tap sensor. They are completely renter-friendly and take about five minutes to install per cabinet. The downside is that you need to replace or recharge the batteries every few weeks depending on how often you use them, which can become annoying over time.
Plug-in LED strips offer more consistent power and brightness. You run a thin strip of LEDs along the bottom edge of the upper cabinets and plug the power supply into a nearby outlet. Many models come with dimmers, color temperature adjustments (warm white to cool white), and even smartphone app controls. The cord management takes a little more planning, but the result is a much more reliable and adjustable setup.
Hardwired LED systems are the most professional and permanent option. They connect directly to your home’s electrical system and are controlled by a wall switch, so there are no visible cords or batteries to worry about. This requires some basic electrical knowledge or hiring an electrician for an hour or two, but the clean, cordless result is absolutely worth it for homeowners planning to stay put for a while.
Why Lighting Matters for Cabinet Updates
When you have updated your cabinets with paint, new hardware, or molding, the under-cabinet lighting highlights those changes and makes them pop. It draws the eye to the refreshed cabinets and creates shadows and depth that make even budget updates look intentional and polished. I think of it as the finishing touch that ties everything together, like the right frame on a painting.
Beyond aesthetics, good task lighting under the cabinets makes cooking safer and easier. You can actually see what you are chopping on the counter. And if you choose LED strips with a warm color temperature (2700K to 3000K), they create a cozy evening glow that makes the kitchen feel welcoming even when you are not cooking.
Difficulty and Cost Comparison for Every Method
After researching all of these methods and reading dozens of real homeowner experiences, I wanted to put together a clear side-by-side comparison. This is the kind of reference I wish I had when I started my own kitchen update. Every method listed here works, but they vary widely in effort, cost, and how long the result will last.
- Painting — Cost: $50 to $200 — Difficulty: Medium — Time: 1 to 2 weekends — Durability: 5 to 10 years with proper prep and quality materials
- Hardware swap — Cost: $30 to $200 — Difficulty: Easy — Time: 1 to 2 hours — Durability: Permanent (hardware lasts indefinitely)
- Crown molding — Cost: $40 to $150 — Difficulty: Medium — Time: 1 day — Durability: Permanent once installed and painted
- Vinyl wrap — Cost: $20 to $100 — Difficulty: Easy — Time: 2 to 4 hours — Durability: 1 to 3 years depending on climate and location
- Open shelving — Cost: $0 to $50 — Difficulty: Easy — Time: 1 to 2 hours — Durability: Permanent
- Glass inserts — Cost: $100 to $300 — Difficulty: Hard — Time: 1 to 3 days — Durability: Permanent
- Under-cabinet lighting — Cost: $20 to $150 — Difficulty: Easy to Medium — Time: 30 minutes to 4 hours — Durability: 5 to 15 years for LED systems
The most impactful combination for the lowest total cost is painting plus new hardware plus under-cabinet lighting. Done right, that combination can cost under $400 total and completely change the character of your kitchen. If you add crown molding to that mix, you are still under $550 and the result rivals kitchens that cost $10,000 or more to renovate.
For renters, the winning combination is vinyl wrap plus battery-operated LED lighting plus adhesive knobs (if your cabinets lack existing hardware). Total cost: $50 to $120. Total reversibility: 100 percent. Total impact: surprisingly high.
Special Tips for Renters and Temporary Updates
If you are renting, you might feel locked out of most of the options on this list. But several methods work perfectly without risking your security deposit or making permanent changes to the property. Here are the ones I specifically recommend for renters.
Peel-and-stick vinyl wrap is your best friend. It transforms flat cabinet doors without any permanent modification. When it is time to move out, heat the vinyl gently with a hair dryer on low and peel it off slowly. Clean any adhesive residue with rubbing alcohol or Goo Gone. The cabinets underneath will be completely untouched.
Adhesive-backed knobs and pulls are an option if your cabinets do not have existing hardware. These attach directly to the door surface without drilling any holes. They are not as sturdy as screwed-in hardware, but they add style and function for the duration of your lease. Command-brand hooks and clips can also work for hanging lightweight items inside cabinet doors.
Battery-operated LED lights require no wiring at all. Stick them under the cabinets and enjoy the upgraded ambiance. When you move out, peel them off and take them with you to your next place. Some brands like Litehouse and GE make affordable options specifically designed for this purpose.
Contact paper on cabinet interiors can brighten the inside of dark, dated cabinets without touching the exterior at all. This is a subtle change but one that makes opening the cabinets feel fresh and clean. Choose a light color or a fun pattern that makes you smile every time you reach for a coffee mug.
Avoid sanding, painting with permanent paint, drilling new holes, replacing hinges, or making any modification that cannot be reversed. Always check your lease agreement first, and take photos before and after any changes in case there is a dispute about the condition of the cabinets when you move out.
If you are a homeowner planning to sell soon, many of these same temporary methods can stage your kitchen effectively without the investment of a full renovation. Fresh hardware, good lighting, and clean cabinets (even wrapped in vinyl) photograph beautifully and cost very little compared to the return in perceived value. Buyers respond to kitchens that look bright, clean, and updated, even if the updates are surface-level.
FAQ
What is the least expensive way to update kitchen cabinets?
The least expensive way to update kitchen cabinets is painting them. A quality paint job costs $50 to $200 in materials and completely transforms the look of your entire kitchen. If painting feels like too much work, simply swapping out the knobs and pulls for $30 to $50 gives you a noticeably fresher kitchen in about an hour of your time.
What is the 1-3 rule for cabinets?
The 1-3 rule for cabinets suggests balancing your kitchen design so that one-third of the visual elements are a focal point or accent while the remaining two-thirds are neutral or supporting tones. In practice, this means choosing one standout feature like colored lower cabinets or a bold backsplash and keeping everything else simple and understated.
How can I modernize outdated kitchen cabinets?
The fastest ways to modernize outdated cabinets are painting them in a contemporary color like soft gray, navy, or warm white, replacing old brass or gold hardware with matte black or brushed brass pulls, and adding under-cabinet LED lighting. Combining these three updates costs under $400 and can make even 1990s oak cabinets feel current and fresh.
What color kitchens are in for 2026?
Warm whites, sage greens, soft blues, and two-tone combinations with darker lower cabinets and lighter upper cabinets are the most popular kitchen cabinet colors in 2026. Earthy tones like terracotta, warm taupe, and muted forest green are also gaining traction for homeowners wanting something beyond basic neutral cabinets.
Wrapping Up Your Budget Cabinet Makeover
Finding the cheapest way to update kitchen cabinets that still looks good does not mean settling for a result that looks cheap. Every method in this guide has been proven by real homeowners who transformed their kitchens on budgets ranging from zero dollars to a few hundred. Painting delivers the most dramatic change for the lowest cost. Hardware swaps are the fastest win you can accomplish in a single afternoon. Lighting, molding, and glass inserts add polish and refinement that make people think you spent far more than you actually did.
Start with whichever method matches your current budget and comfort level. A hardware swap this Saturday can give you the confidence and motivation to tackle painting next weekend. Add lighting the week after that, and suddenly your kitchen feels entirely different. The key is simply starting, because even one small change can shift how your entire kitchen feels. Pick your method, gather your supplies, and give your cabinets the refresh they deserve.