
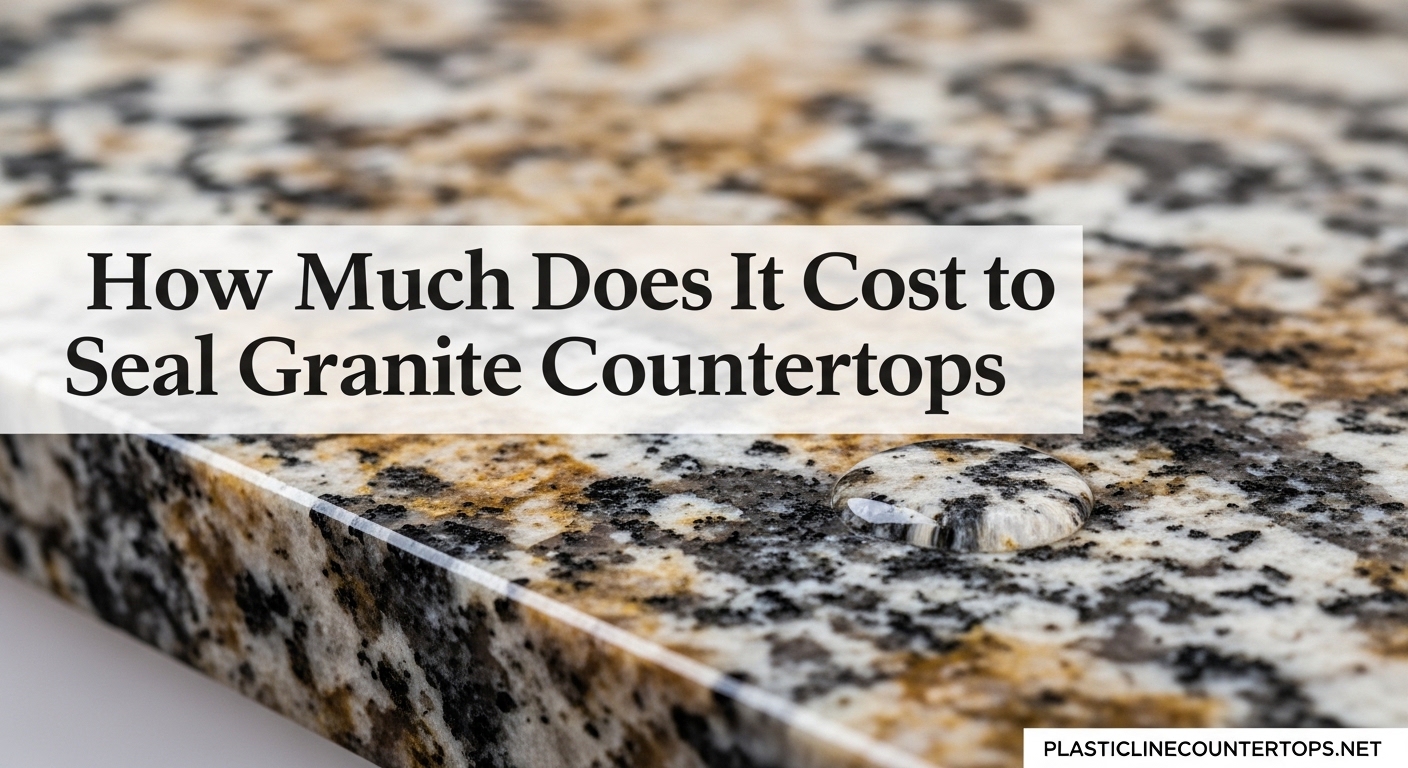
Granite countertops are one of the smartest investments you can make in a kitchen or bathroom. They look incredible, they handle heat well, and with proper care, they last for decades. But that durability comes with a catch: granite is a naturally porous stone, and without regular sealing, it acts like a sponge for spills, stains, and moisture. If you are researching how much does it cost to seal granite countertops, you are already ahead of most homeowners who skip this step entirely and pay for it later.
The short answer is that sealing granite costs anywhere from $15 if you do it yourself to over $350 if you hire a professional service. The exact price depends on your countertop size, the type of sealant you choose, and whether you handle the work yourself or bring in a pro. I have sealed dozens of granite surfaces over the years, and I can tell you that the process is simpler than most people expect, but the cost details are worth understanding before you start.
Here is a quick breakdown of what you can expect to pay:
- DIY sealant only: $15 to $65 for a bottle of granite sealer (covers 50 to 200 sq ft depending on the brand and concentration)
- DIY full project: $20 to $80 including sealer, microfiber cloths, painter’s tape, and cleaning supplies
- Professional sealing: $100 to $350+ for an average kitchen (roughly 40 to 60 square feet of countertop)
- Professional per square foot: $0.50 to $2.00 per sq ft for sealing only, or $1.50 to $5.00 per sq ft if deep cleaning is included
- Resealing frequency: Every 1 to 3 years depending on granite type and usage
In this guide, our team breaks down every cost factor, walks you through the DIY process step by step, explains when professional sealing makes more sense, and shares maintenance tips that keep your granite protected between sealings. By the end, you will know exactly what you should pay and which approach fits your situation best.
Table of Contents
Granite Countertop Sealing Cost Breakdown
The cost to seal granite countertops falls into two main categories: the materials you buy for a DIY project, or the service fee charged by a professional. Both approaches are common, and the right choice depends on your budget, the condition of your stone, and how much time you want to spend on the project. Let us look at each cost category in detail.
DIY Sealing Costs
If you plan to seal granite countertops yourself, your only real expense is the sealer and a few basic supplies. A standard quart-sized bottle of quality granite sealer runs between $15 and $45 at most home improvement stores like Home Depot or Lowe’s. Larger sizes or professional-grade concentrates can push that up to $50 to $65 per container.
Here is what popular granite sealer brands typically cost:
- Granite Gold Sealer: $15 to $22 for a 24-ounce spray bottle (covers approximately 75 sq ft)
- TriNova Granite Sealer: $18 to $25 for a 32-ounce spray (covers approximately 100 sq ft)
- StoneTech BulletProof Sealer: $35 to $55 for a quart (covers approximately 50 to 75 sq ft)
- MARBLELIFE Granite Sealer: $25 to $40 for a 16-ounce bottle (covers approximately 50 sq ft)
- Miracle Sealants 511 Impregnator: $20 to $35 for a quart (covers approximately 75 to 150 sq ft)
Beyond the sealer itself, you may need a few inexpensive supplies: microfiber cloths ($5 to $8 for a pack), painter’s tape ($4 to $6), and a granite-safe cleaner ($8 to $12) if your countertops need a deep clean before sealing. That brings the total DIY project cost to roughly $20 on the low end and $80 on the high end for a typical kitchen.
One thing to keep in mind: cheaper spray sealers like Granite Gold tend to require more frequent reapplication. Many users on home improvement forums report needing to reseal every 3 to 6 months with budget sprays. Higher-end penetrating sealers like StoneTech BulletProof or Miracle 511 can last 3 to 5 years between applications, which makes them a better long-term value despite the higher upfront cost.
Professional Sealing Costs
Hiring a professional to seal your granite countertops costs significantly more than DIY, but it includes labor, expertise, and often a warranty. Based on data from services like Angi and Homewyse, professional granite sealing runs $100 to $350 for an average-sized kitchen. That typically translates to $0.50 to $2.00 per square foot for sealing only, or $1.50 to $5.00 per square foot if the service includes deep cleaning, stain treatment, and sealing combined.
Professional pricing varies based on several factors:
- Countertop size: A small bathroom vanity (10 to 15 sq ft) might cost $50 to $100, while a large kitchen island with extensive countertop area (80+ sq ft) can run $250 to $500 or more
- Granite condition: Countertops that have not been sealed in years, or that have existing stains and etching, will cost more because they require extra prep work
- Geographic location: Labor rates in major metropolitan areas tend to be 20 to 40 percent higher than in smaller cities or rural areas
- Service scope: Basic sealing is cheaper than a full restoration package that includes cleaning, polishing, and sealing
- Number of coats: Most professionals apply two to three coats, which is factored into their pricing
One Reddit user shared a real quote of $250 to clean and seal 77 square feet of granite, which breaks down to approximately $3.25 per square foot. They asked the community if that was fair, and the general consensus was that while it was on the higher end, it was reasonable for a professional job that included both cleaning and sealing. This is consistent with the range of $1.50 to $5.00 per square foot we see from professional services.
Quick Cost Comparison: DIY vs Professional
To make the comparison easier, here is a side-by-side look at what you can expect to pay for a typical 50-square-foot kitchen:
- DIY with budget sealer: $15 to $25 (sealer only, expect to reseal every 6 months)
- DIY with premium sealer: $35 to $65 (sealer only, expect 3 to 5 years of protection)
- DIY with all supplies: $45 to $85 total (sealer, cloths, tape, cleaner)
- Professional sealing only: $100 to $200 (labor and materials included)
- Professional cleaning and sealing: $175 to $350 (deep clean, stain treatment, and sealing)
The savings from going the DIY route are substantial, but the value of professional work comes down to convenience, warranty coverage, and the assurance that the job was done correctly. For homeowners who are comfortable with basic home projects, DIY sealing is straightforward and takes about 1 to 2 hours from start to finish.
How to Seal Granite Countertops Yourself: A Complete DIY Guide
Sealing granite countertops is one of those home maintenance tasks that sounds intimidating but is actually quite manageable. I have sealed granite surfaces in my own home and helped friends with theirs, and the entire process takes about an hour of active work plus some drying time. Here is everything you need to know to do it right.
Step 1: Test Whether Your Granite Needs Sealing
Before you spend money on sealer, confirm that your countertops actually need it. The water drop test is the most reliable method and takes less than 15 minutes.
Place a few tablespoons of water on the granite surface in different areas, especially spots that get the most use. Let the water sit for 10 to 15 minutes. If the water beads up and stays on the surface without soaking in, your granite does not need resealing yet. If the water begins to absorb into the stone and you see a darkened area underneath it, the seal has worn off and it is time to reapply.
You can also do an oil test for extra confirmation. Place a few drops of cooking oil on the surface and wait 10 minutes. If the oil soaks in and leaves a dark spot, the seal is compromised. Wipe up the oil immediately after the test regardless of the result.
Forum users frequently mention that darker granite types like Absolute Black or Uba Tuba tend to be less porous and may need sealing less often, while lighter granites like White Ice or Kashmir White are more porous and benefit from more frequent sealing. When in doubt, do the water test.
Step 2: Choose the Right Sealer
Not all granite sealers are created equal. The two main categories are water-based and solvent-based sealers, and each has distinct advantages.
Water-based sealers use water as the carrier for the active sealing agents. They have low VOC (volatile organic compound) content, which means they are safer to use indoors, have less odor, and are easier to clean up. They are the most popular choice for homeowners doing DIY sealing. Water-based options like TriNova and Granite Gold are widely available and user-friendly, though they may need more frequent reapplication.
Solvent-based sealers use chemical solvents to carry the sealing agents deeper into the stone. They tend to provide longer-lasting protection and are better suited for highly porous granite. The trade-off is stronger fumes, the need for better ventilation during application, and typically a higher price point. StoneTech BulletProof and Miracle Sealants 511 Impregnator are popular solvent-based options that professionals frequently recommend.
For most homeowners doing a DIY project, a quality water-based sealer provides plenty of protection. If your granite is highly porous, has never been sealed, or has not been sealed in over five years, a solvent-based penetrating sealer is worth the extra cost.
Step 3: Gather Your Materials
Before you start the application, make sure you have everything ready:
- Granite sealer (water-based or solvent-based, your choice based on the section above)
- Clean microfiber cloths (at least 3 to 4)
- Painter’s tape (to protect adjacent surfaces like cabinets and backsplashes)
- Granite-safe cleaner or mild dish soap
- Soft-bristle brush for cleaning grout lines or textured areas
- Gloves and ventilation (especially important for solvent-based sealers)
- A timer or clock for tracking curing time
The total cost for all of these materials, assuming you buy them new, runs between $30 and $80 depending on the sealer you choose. Many homeowners already have microfiber cloths and painter’s tape on hand, which brings the cost down to just the sealer.
Step 4: Clean the Countertops Thoroughly
This is the step that most DIY guides gloss over, but it is absolutely critical. Sealer applied over dirt, grease, or old sealer residue will not bond properly with the stone, and you will end up with patchy protection or a hazy film on the surface.
Start by clearing everything off the countertops. Wipe down the entire surface with a granite-safe cleaner or a mixture of warm water and a few drops of mild dish soap. Pay extra attention to areas around the sink, stovetop, and any spots where you frequently prepare food. Rinse with clean water and dry completely with a microfiber cloth.
If your countertops have existing stains, address them before sealing. A paste made from baking soda and water can lift many organic stains. For oil-based stains, a poultice of diatomaceous earth and hydrogen peroxide works well. Let any treated areas dry fully before moving on to sealing.
Allow the countertops to dry for at least 2 to 4 hours after cleaning. The stone needs to be completely dry for the sealer to penetrate properly. Rushing this step is one of the most common mistakes people make.
Step 5: Apply the Sealer
With clean, dry countertops, you are ready to apply the sealer. Follow these steps:
First, tape off any areas you want to protect from overspray, including cabinet edges, backsplashes, and the sink area. This takes 5 minutes and saves a lot of cleanup later.
Next, apply the sealer in a thin, even coat across the granite surface. If using a spray sealer, hold the bottle 6 to 8 inches from the surface and spray in a sweeping motion. If using a pour-on sealer, pour a small amount directly onto the stone and spread it with a clean microfiber cloth or foam applicator pad. Work in manageable sections of about 3 to 4 square feet at a time.
Allow the sealer to sit on the surface for the time recommended on the product label. This is typically 5 to 20 minutes depending on the brand and formula. The sealer needs time to penetrate into the stone’s pores. Do not let it dry completely on the surface, as this can cause streaking.
After the recommended dwell time, wipe off any excess sealer with a clean microfiber cloth. Buff the surface in circular motions until it feels dry to the touch and there are no visible wet spots or streaks.
Most sealers require a second coat for best results. Wait the recommended time between coats (usually 30 minutes to 2 hours) and repeat the process. Two thin coats provide better protection than one thick coat.
Step 6: Allow Proper Curing Time
After the final coat, the sealer needs time to fully cure. Most water-based sealers reach initial protection within 2 to 4 hours, but full curing takes 24 to 48 hours. Solvent-based sealers may need up to 72 hours for complete curing.
During the curing period, avoid placing heavy items on the countertops, wiping them down with cleaning products, or exposing them to standing water. Light use is generally fine after 4 to 6 hours, but hold off on any cleaning for at least 24 hours.
Step 7: Test Your Work
After the curing period is complete, repeat the water drop test. Place a few tablespoons of water on different areas of the countertop and wait 15 minutes. If the water beads up and does not absorb, your sealing job was successful. If water still soaks in, apply an additional coat and repeat the curing process.
This verification step is something many homeowners skip, but it takes almost no effort and gives you confidence that your granite is properly protected. If you applied two coats and the water still absorbs, you may have a highly porous granite that requires three coats, or you may need to switch to a more concentrated sealer.
Common DIY Sealing Mistakes to Avoid
After reading through dozens of forum posts from homeowners who had issues with DIY sealing, a few common mistakes kept coming up:
- Applying sealer over dirty or greasy countertops prevents proper absorption and leads to uneven protection
- Using too much sealer at once causes pooling, streaking, and a hazy residue that is difficult to remove
- Not allowing enough drying time between coats traps moisture and reduces the effectiveness of each layer
- Skipping the water test beforehand means you might be sealing countertops that do not need it yet, wasting time and money
- Using the wrong cleaning products after sealing, especially acidic cleaners like vinegar or lemon-based products, which can degrade the sealer
Many Reddit users report success with the Miracle Sealants 511 Impregnator available at Home Depot and Lowe’s, noting that it is easy to apply and provides long-lasting protection. Users who experienced problems with hazy residue typically traced the issue back to applying too much sealer at once or not buffing off the excess quickly enough.
Professional Granite Sealing Services: When to Hire a Pro
DIY sealing works well for most situations, but there are times when calling in a professional makes more sense. Understanding what professional services include, what they cost, and when they are worth the investment helps you make the right call for your countertops.
What Professional Sealing Includes
A professional granite sealing service typically goes beyond what most homeowners can accomplish on their own. The process usually includes a thorough deep cleaning of the stone surface, inspection for existing damage like cracks, chips, or stains, application of commercial-grade sealer in multiple coats, and a final buffing and polish. Many services also include a warranty or guarantee that covers re-treatment if the sealer fails within a specified period.
Some companies offer tiered packages. A basic sealing package covers just the sealant application. A mid-tier package adds deep cleaning and stain pretreatment. Premium packages may include polishing, chip repair, and color enhancement alongside the sealing. The price differences between these tiers are significant, so it is worth understanding what you are paying for.
When Professional Sealing Is Worth the Cost
In my experience, professional sealing is the better choice in several specific situations:
- Newly installed granite: If your granite was just installed, having the initial sealing done professionally ensures the stone gets proper protection from day one. Some installers include the first sealing in their installation package
- Neglected countertops: If your granite has not been sealed in 5 or more years and has visible staining, etching, or discoloration, a professional can restore the surface before sealing
- Large or complex layouts: Kitchens with extensive countertop area, multiple islands, or intricate edge profiles take considerably more time and effort to seal properly
- Commercial properties: Restaurants, hotels, and offices with high-traffic granite surfaces benefit from professional-grade products and warranties
- Lack of time or confidence: If the DIY process sounds overwhelming or you simply do not have a free afternoon, paying someone else to handle it is a reasonable choice
How to Find a Reliable Sealing Service
Not all professional sealing services deliver equal results. When looking for a contractor, start by checking reviews on platforms like Angi, Google, or the Better Business Bureau. Ask for references and photos of previous work. A reputable company should be willing to discuss their process, the specific sealer they use, and what their warranty covers.
Get at least two or three quotes before committing. Prices can vary significantly between companies, even in the same area. The quote should specify the square footage being sealed, the number of coats applied, the type of sealer used, and any prep work included. Be wary of companies that offer unusually low prices, as they may cut corners on preparation or use inferior products.
Several forum users noted that the best value often comes from small, local stone restoration companies rather than large national chains or general cleaning services. Stone specialists tend to have more experience with different granite types and can tailor their approach to your specific stone.
Understanding Warranties and Guarantees
Many professional sealing services offer warranties ranging from 1 year to lifetime coverage. Be realistic about what these warranties actually cover. A 1-year warranty is fairly standard and typically covers reapplication if the sealer fails prematurely due to product defects or improper application. Longer warranties may sound appealing, but read the fine print carefully.
Some “lifetime” warranties require annual inspections and maintenance by the same company, which adds to the overall cost over time. Others only cover product failure and exclude damage from improper cleaning, spills left too long, or normal wear. Ask specific questions about what is and is not covered before making a decision based on warranty length.
Granite Countertop Maintenance Tips to Extend Sealer Life
The best way to keep your granite countertop sealing costs low is to make the sealer last as long as possible between applications. Proper daily maintenance can add months or even years to the life of your seal, saving you money and protecting your stone investment.
How Often Should You Reseal Granite?
Resealing frequency depends on the type of granite, the quality of the sealer, and how heavily the countertops get used. As a general guideline, most granite countertops benefit from resealing every 1 to 3 years. Darker, less porous granites may go 3 to 5 years between sealings, while lighter, more porous varieties might need attention every 12 to 18 months.
Rather than sealing on a fixed schedule, I recommend doing the water drop test every 6 months. It takes less than 15 minutes and tells you exactly when it is time to reseal. Sealing too frequently is not harmful, but it wastes money. Sealing too infrequently leaves your granite vulnerable to permanent stains.
The frequency also depends on which sealer you used. Budget spray sealers like Granite Gold may only last 3 to 6 months, as many forum users have reported. Premium penetrating sealers like StoneTech BulletProof or Miracle 511 Impregnator can protect for 3 to 5 years under normal use.
Daily Cleaning Do’s and Don’ts
How you clean your granite countertops has a direct impact on how long the sealer lasts. Follow these guidelines to get the most life out of each sealing application:
Do:
- Wipe up spills immediately, especially acidic liquids like wine, coffee, citrus juice, and vinegar
- Use a soft microfiber cloth for daily cleaning
- Clean with a pH-neutral, granite-safe cleaner or warm water with mild dish soap
- Dry the surface after cleaning to prevent water spots and mineral buildup
- Use cutting boards and trivets to minimize direct contact with the stone
Don’t:
- Use vinegar, bleach, ammonia, or any acidic cleaning products on sealed granite
- Scrub with abrasive pads, steel wool, or harsh brushes that can wear down the sealer
- Leave standing water on the countertops for extended periods
- Use generic all-purpose cleaners unless they are specifically labeled safe for natural stone
- Place hot pans directly on the granite (while granite is heat-resistant, thermal shock can weaken the sealer over time)
Signs Your Sealer Is Failing
Catching sealer failure early gives you time to reseal before permanent damage occurs. Watch for these warning signs:
- Water no longer beads on the surface and begins to absorb into the stone
- You notice dark spots or rings appearing after spills that were not wiped up immediately
- The granite surface feels rougher or more textured than it used to
- Areas around the sink or stovetop look dull or discolored compared to the rest of the countertop
- Cleaning does not restore the shine the way it used to
If you notice any of these signs, do the water drop test to confirm. If the test shows absorption, plan to reseal within the next few weeks. The longer you wait, the greater the risk of permanent staining.
Tips to Maximize Sealer Longevity
Beyond daily cleaning, a few extra habits can significantly extend the life of your granite sealer:
- Use coasters under glasses, especially for acidic beverages like wine and juice
- Keep the area around the sink sealed and reapply sealer to that zone more frequently, since water exposure is highest there
- Avoid using the countertop as a workspace for messy projects without a protective barrier
- Re-seal high-traffic areas separately if needed, rather than waiting for the entire countertop to need treatment
- Store cleaning products properly and avoid leaving bottles sitting on the granite where spills can go unnoticed
Homeowners on home improvement forums consistently report that the single biggest factor in sealer longevity is immediate spill cleanup. Granite that is sealed properly can resist most liquids for several hours, but acidic substances like lemon juice or wine can begin to degrade the sealer within 30 minutes if left unattended.
FAQ
Should I have my granite professionally sealed?
Professional sealing is worth it if your granite has not been sealed in over 5 years, if you have extensive staining or etching, or if you are not comfortable doing the work yourself. For routine maintenance sealing on granite in good condition, a DIY approach with a quality sealer works just as well for a fraction of the cost. The main advantages of professional sealing are the commercial-grade products, multi-coat application, and warranty coverage.
How much does it cost to have your granite countertop sealed?
Professional granite countertop sealing typically costs $100 to $350 for an average kitchen (40 to 60 square feet). Pricing runs $0.50 to $2.00 per square foot for sealing only, or $1.50 to $5.00 per square foot if deep cleaning and stain treatment are included. A small bathroom vanity may cost as little as $50, while a large kitchen with an island can run $400 or more.
How long do granite sealers last?
Granite sealers generally last between 1 and 5 years depending on the product quality and how heavily the countertops are used. Budget spray sealers like Granite Gold typically last 3 to 6 months. Premium penetrating sealers like StoneTech BulletProof or Miracle 511 Impregnator can last 3 to 5 years. Do a water drop test every 6 months to check if your sealer is still working.
Is it worth it to seal granite after not doing it for 5 years?
Yes, absolutely. Even if your granite has gone years without sealing, applying a fresh coat of sealer now will provide immediate protection against future stains and moisture damage. If the granite has absorbed stains during that time, you may want to treat those stains before sealing, or hire a professional for a restoration-plus-sealing service. The cost of sealing is far lower than the cost of replacing or repairing permanently damaged countertops.
Can you reseal granite countertops yourself?
Yes, resealing granite countertops is a straightforward DIY project that takes about 1 to 2 hours of active work plus drying time. You need a quality granite sealer ($15 to $65), microfiber cloths, and a clean surface. The process involves cleaning the countertops, applying the sealer in thin even coats, waiting for it to penetrate, wiping off the excess, and allowing proper curing time. Most homeowners can handle this without any special skills or tools.
What happens if you never seal granite countertops?
Unsealed granite absorbs liquids like a sponge. Water, oil, wine, coffee, and juice can all penetrate the stone and cause permanent stains that are difficult or impossible to remove without professional restoration. Moisture penetration can also weaken the stone over time, lead to bacterial growth in the pores, and cause discoloration. Restoration work for badly stained granite typically costs $200 to $1,200, far more than the $15 to $65 cost of a DIY sealer.
How do I know if my granite needs to be resealed?
Do the water drop test. Place a few tablespoons of water on the granite surface and wait 10 to 15 minutes. If the water beads up and stays on the surface, your seal is intact. If the water absorbs into the stone and you see a darkened area underneath, the seal has worn off and it is time to reapply. Test different areas of the countertop, especially around the sink and high-use zones, as sealer can wear unevenly.
Conclusion
Figuring out how much does it cost to seal granite countertops comes down to two main paths. You can spend $15 to $65 on a quality sealer and handle the job yourself in an afternoon, or you can pay $100 to $350 for a professional service that includes labor, commercial-grade products, and warranty coverage. Both approaches are valid, and the right choice depends on your comfort level, the condition of your granite, and how much time you want to invest.
The most important takeaway is this: sealing your granite is not optional if you want to protect your investment. Unsealed granite absorbs liquids, stains easily, and can sustain permanent damage that costs hundreds or even thousands of dollars to repair. A $25 bottle of sealer applied every couple of years is cheap insurance for countertops that cost thousands to install.
Do the water drop test today. If your granite needs sealing, grab a quality sealer and set aside a couple of hours this weekend. Your countertops will thank you for years to come.