
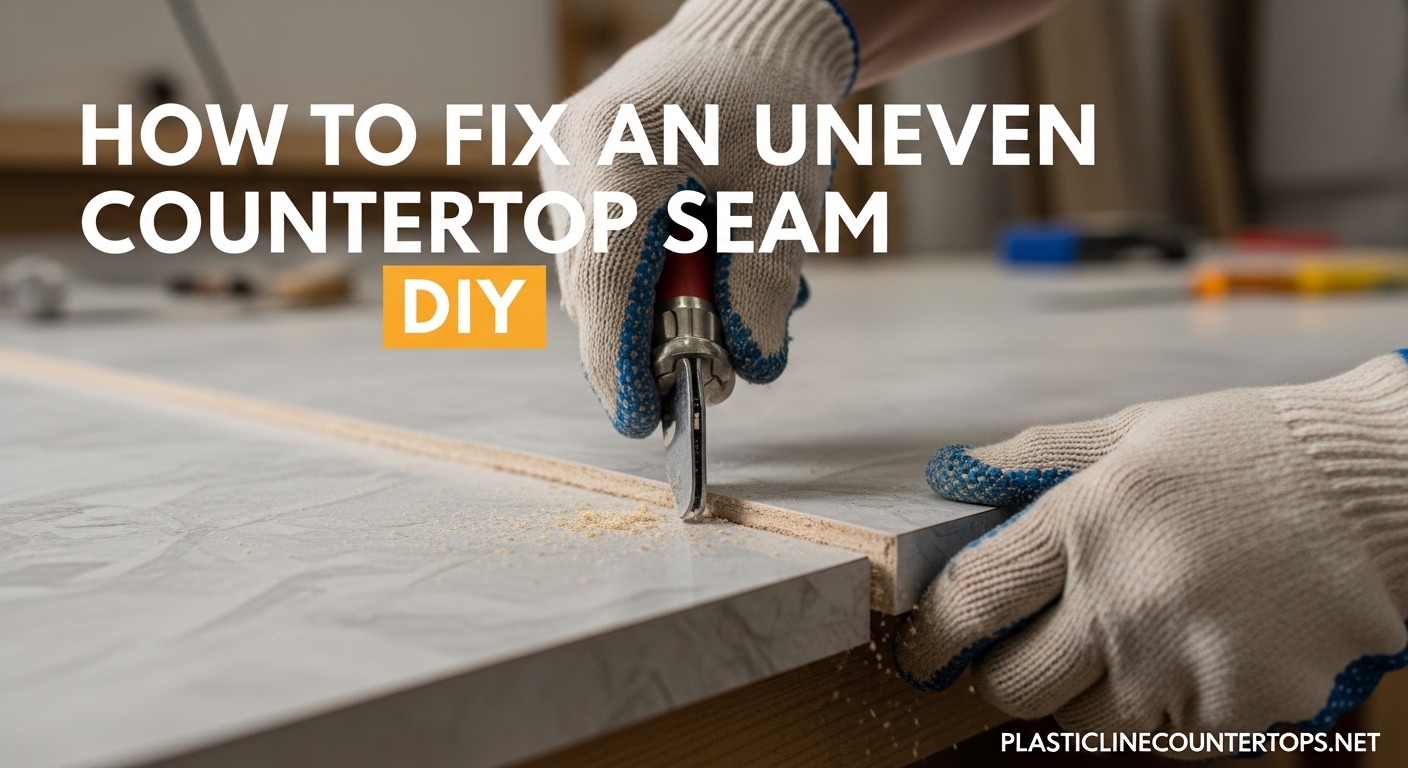
That annoying ridge running along your countertop seam is more than just an eyesore. It catches crumbs, traps water, and every time you wipe the counter your hand notices that bump. If you are dealing with a seam where one side sits higher than the other, you are not alone. This is one of the most common complaints homeowners have after a countertop installation, and it can also develop over time as houses settle and materials shift.
The good news is that many uneven countertop seams can be fixed as a DIY project, depending on the material and severity of the problem. This guide walks you through exactly how to fix an uneven countertop seam using DIY methods, from diagnosing the cause to choosing the right materials for granite, laminate, quartz, and solid surface countertops. You will learn the tools you need, the step-by-step repair process, safety precautions, and when it makes more sense to call in a professional.
Whether your seam has a slight lip, a visible gap, or a full-on height mismatch, the approaches covered here will help you get your countertop looking clean and level again.
Table of Contents
What Causes an Uneven Countertop Seam
Uneven countertop seams happen for a handful of reasons. Understanding the root cause of your specific problem is the first step toward a lasting fix. Here are the most common culprits, ranked by how frequently we see them:
1. Poor installation and slab misalignment. This is the number one cause. During installation, the two pieces were not properly aligned before the adhesive set. Sometimes the crew rushed, used too little adhesive on one side, or failed to use seam setters and clamps correctly. The result is a permanent lip where one slab sits higher than the other.
2. Substrate settling or shifting. Cabinets settle into floors over the years, especially in newer homes. As the cabinet base shifts even a fraction of an inch, the countertop above it shifts too. This movement pulls the two sides of a seam out of alignment, creating a ridge that was not there when the counter was new.
3. Moisture damage to the substrate. Water seeping into the seam over months or years can swell the plywood or particleboard substrate beneath laminate countertops. As the substrate expands, it pushes one side of the seam upward. This is especially common near sinks and dishwashers where humidity and occasional splashes are unavoidable.
4. Adhesive failure. The epoxy or glue holding the seam together can degrade over time. Temperature swings, cleaning chemicals, and age all weaken the bond. Once the adhesive starts to fail, the two pieces drift apart vertically, creating that uneven feel.
5. Structural movement of the house. Homes in areas with expansive clay soils or seasonal freeze-thaw cycles experience foundation movement. That movement transfers up through walls and cabinets to the countertop. Seams near outside walls or over large cabinet spans are most vulnerable.
6. Temperature and humidity fluctuations. Stone materials like granite expand and contract with temperature changes. Over years of seasonal cycles, the repeated micro-movements at the seam can cause one edge to work its way higher than the other, especially if the original adhesive bond was not ideal.
How to Diagnose Your Countertop Seam Problem
Before you start any repair, take ten minutes to properly diagnose what is going on. The fix depends entirely on the type and severity of the problem.
Measure the Height Difference
Run a straightedge across the seam. A metal ruler or level works well. Measure the gap between the straightedge and the low side using a feeler gauge or even a piece of paper. Write down the measurement. Anything under 1/32 inch is considered normal by industry standards and may not be worth fixing. A difference of 1/16 to 1/8 inch is noticeable and fixable. Anything over 1/8 inch suggests a more serious issue with the substrate or installation.
Check for Substrate Damage
If you can access the underside of the countertop (open the cabinet below), look for signs of water damage. Swollen particleboard, dark stains, or a musty smell all point to moisture as the root cause. Push gently on the substrate near the seam. If it feels soft or spongy, you have water damage that needs to be addressed before you fix the seam itself.
Identify Your Countertop Material
The repair approach differs significantly between materials. Granite and quartz require epoxy and possibly grinding. Laminate needs seam filler and adhesive. Solid surface can be joined almost invisibly with the right adhesive. If you are not sure what you have, try this: tap the surface with your knuckle. Stone sounds sharp and solid. Laminate sounds hollow. Solid surface has a duller, more plasticky ring.
Determine the Seam Type
Is the seam raised (one side higher), separated (a visible gap between the pieces), or both? A raised seam with no gap means the pieces are still bonded but misaligned. A gap means the adhesive has failed. Both problems together means you likely need to remove the old adhesive, re-level, and re-bond the seam.
Tools and Materials You Will Need
The exact tools depend on your countertop material and the type of repair. Here is a complete list organized by category so you can gather what applies to your situation.
Essential Tools for All Repairs
- 6-inch or 12-inch straightedge or level
- Feeler gauge set or thickness shims
- Utility knife with fresh blades
- Putty knife (rigid and flexible)
- Painter’s tape (blue or green, low-tack)
- Clean rags and isopropyl alcohol
- Shop vacuum with brush attachment
For Stone Countertops (Granite, Quartz, Marble)
- Knife-grade epoxy (color-matched to your stone)
- Diamond hand pad set (50, 100, 200, 400, 800, 1500 grit)
- Angle grinder with diamond polishing pad (optional for larger jobs)
- Seam setter or suction cup clamps
- Acetone for cleaning old adhesive residue
- Plastic spreaders for epoxy application
For Laminate Countertops
- Color-matched laminate seam filler (SeamFil or equivalent)
- Contact cement or laminate adhesive
- Seam roller or J-roller
- Heat gun (for softening old adhesive)
- Wood shims for leveling
- Weighted objects (books, bricks) for clamping
For Solid Surface Countertops
- Manufacturer-approved solid surface adhesive (color-matched)
- Seam clamp kit for solid surface
- Sanding block with progressive grits (120, 220, 400, 600)
- Random orbital sander (optional)
Safety Equipment
- NIOSH-approved N95 respirator (mandatory for stone grinding)
- Safety goggles
- Work gloves
- Knee pad (if working on lower cabinets)
Safety Precautions Before You Start
Before diving into the repair, take these safety steps seriously. Skipping them can lead to health problems or permanent damage to your countertop.
Silica Dust Hazard
This is the biggest safety concern. Grinding, sanding, or polishing granite, quartz, or any engineered stone releases crystalline silica dust. Breathing silica dust causes silicosis, an irreversible lung disease. If you plan to grind or sand any stone material, an N95 respirator is non-negotiable. Open windows, run a fan to blow dust away from your face, and vacuum dust frequently. Never dry-grind stone indoors without respiratory protection.
Chemical Safety
Epoxy hardeners, acetone, and contact cement all release volatile organic compounds (VOCs). Work in a well-ventilated area. If you smell strong fumes, step outside for fresh air. Keep these chemicals away from open flames, as acetone and contact cement are highly flammable.
Know When to Stop
If you discover that the substrate is rotted, the cabinets are visibly sagging, or the height difference is more than 1/4 inch, stop and call a professional. These issues indicate structural problems that a surface-level DIY fix will not solve. Continuing to work on a compromised substrate can make the problem worse and more expensive to fix later.
How to Fix an Uneven Countertop Seam: Step-by-Step DIY Repair
This is the core repair process that works for most seam issues. Material-specific variations follow in the next section.
Step 1: Clear and Clean the Area
Remove everything from the countertop around the seam. Wipe the entire area with a damp cloth, then clean with isopropyl alcohol to remove any grease, wax, or residue. Tape off the seam with painter’s tape, leaving the seam line exposed. This protects the surrounding surface from epoxy drips and scratches during sanding.
Step 2: Remove Old Adhesive and Debris
Use a utility knife to carefully score along both sides of the seam. Scrape out any loose adhesive, grout, or caulk using a putty knife. For stone countertops, apply acetone to soften stubborn old epoxy, then scrape it away. Vacuum all debris from the seam channel. The cleaner the seam, the better your new adhesive will bond.
Step 3: Inspect and Fix the Substrate
Before leveling the top surface, check underneath. Open the cabinet below the seam and look up at the underside of the countertop. If you see water damage, let the area dry completely (use a fan for 24 to 48 hours). For swollen particleboard, you may need to reinforce the area with a piece of plywood screwed to the cabinet frame. If the substrate is solid and dry, proceed to the next step.
Step 4: Level the Seam with Shims
This is where the actual leveling happens. For seams where one side is slightly higher, the goal is to bring the low side up rather than grind the high side down. Place wood shims between the substrate and the low side of the countertop, gently tapping them in with a mallet. Check the surface with your straightedge after each shim. Go slow. It is easier to add another shim than to remove one you drove in too far.
For larger height differences, you may need to loosen the screws holding the countertop to the cabinets, adjust the position, add shims under the countertop at the cabinet rail, then re-tighten. This approach gives you more control over the final alignment.
Step 5: Apply Adhesive or Filler
Once the two sides are level, it is time to bond them. Mix your adhesive according to the manufacturer’s instructions. For stone, use a knife-grade epoxy color-matched to your countertop. For laminate, use a color-matched seam filler. Apply the adhesive into the seam channel using a plastic spreader, pressing firmly to fill every void. Overfill slightly. You will sand the excess flush later.
Step 6: Clamp and Cure
Place clamps or a seam setter across the seam to hold the two pieces tightly together while the adhesive cures. For stone, use suction cup clamps on the top surface. For laminate, a weighted board across the seam works well. Follow the adhesive manufacturer’s recommended cure time. Most epoxies need 24 hours. Do not rush this step. Removing clamps too early can shift the alignment.
Step 7: Sand, Grind, and Polish Flush
After the adhesive is fully cured, remove the clamps and tape. The adhesive should be slightly proud of the surface. Start with a coarse abrasive to bring it flush with the countertop. For stone, use diamond hand pads starting at 100 grit and work up through 200, 400, 800, and finally 1500 grit for a polished finish. For laminate, use fine-grit sandpaper (220 then 400) and sand lightly by hand. Always sand in the direction of the seam, not across it, to avoid visible scratches.
Step 8: Final Color Matching and Blending
Inspect the repaired seam under good lighting. If the filler color does not match perfectly, you can apply a second thin layer of color-matched filler just to the surface and sand it flush again. For stone countertops, a final polish with a buffing compound helps blend the repair into the surrounding surface. Step back and look at the seam from multiple angles. A well-done repair should be nearly invisible from normal viewing distance.
Material-Specific Repair Techniques
The general process above works for all materials, but each countertop type has its own quirks. Here is what you need to know for the most common materials.
Fixing Uneven Granite Seams
Granite is the material most people ask about when dealing with uneven seams. The standard approach is epoxy leveling and polishing. After cleaning the seam and shimming level, fill with knife-grade epoxy that matches the base color of your granite. For dark granite, a black or dark gray epoxy blends well. For lighter or speckled granite, you may need to mix multiple colorants to match. Tenax is a widely used brand that fabricators trust.
If one side is significantly higher (over 1/16 inch) and shimming does not solve it, grinding may be necessary. Use an angle grinder with a diamond pad, working in light passes. Grind the high side down gradually, checking with a straightedge frequently. Stop grinding before you reach the target height and finish with hand pads. Always wear a respirator and goggles when grinding granite. After grinding, polish through the grit sequence to restore the factory finish.
Fixing Uneven Laminate Countertop Seams
Laminate seams are different because the surface material is thin and the substrate underneath plays a bigger role. If the laminate is lifting at the seam, the fix involves regluing the lifted section. Use a heat gun on low to soften the old adhesive, press the laminate flat, and apply fresh contact cement underneath. Roll with a J-roller to ensure good contact.
For visible gaps in laminate seams, use a color-matched laminate seam filler like SeamFil. Clean the gap thoroughly, apply the filler with a putty knife, and scrape the surface flush. These fillers come in dozens of colors and can be mixed to match most laminate patterns. For substrate swelling issues near sinks, the damaged particleboard needs to be dried and reinforced before the seam repair will last.
Fixing Uneven Quartz Countertop Seams
Quartz repairs are similar to granite but with one important difference: quartz contains resin binders that can discolor if you grind too aggressively. Use lighter pressure and slower speeds when grinding quartz. Color-matched epoxy is still your best filler option. Because quartz is manufactured to have consistent patterns, achieving a seamless look is generally easier than with natural granite.
One common issue with quartz seams is that the resin at the factory edge can be slightly different in color from the polished surface. When you cut or grind the edge, this color difference shows. If you need to grind a quartz seam, keep the grinding to the absolute minimum and blend the transition carefully with progressive polishing pads.
Fixing Solid Surface Countertop Seams
Solid surface materials like Corian are the most forgiving when it comes to seam repair. The material is homogeneous, meaning the color goes all the way through. With the right color-matched adhesive and proper clamping, solid surface seams can be made completely invisible.
The key is using the adhesive specifically made for your solid surface brand. Generic adhesives often do not bond correctly. Clean both seam edges, apply the adhesive, clamp with solid surface seam clamps, and let cure. Sand flush starting at 120 grit and work through 220, 400, and 600 grit. The final result should be smooth and invisible.
Common DIY Mistakes to Avoid
After reading through hundreds of forum threads and homeowner repair stories, these are the mistakes that come up over and over. Avoid these and your repair will turn out significantly better.
Over-grinding and creating a dip. This is the most common error with stone countertops. People keep grinding to get the seam perfectly flush and end up with a visible depression. Stop grinding before you reach the target. Finish with hand pads where you have more control. A slightly proud seam sanded smooth looks better than a dip that collects water and debris.
Using the wrong adhesive. Super glue, silicone caulk, and construction adhesive are not suitable for countertop seams. Each material requires a specific adhesive chemistry. Epoxy for stone, contact cement for laminate, and manufacturer-specific adhesive for solid surface. Using the wrong product means the repair fails within months.
Skipping the substrate inspection. Many homeowners fill the seam at the surface without checking what is happening underneath. If the substrate is swollen, cracked, or missing, the surface repair will not last. Always look underneath before repairing the top.
Rushing the cure time. Removing clamps early or sanding before the adhesive has fully cured ruins the bond. Follow the manufacturer’s cure time recommendation, and add a few extra hours if your workspace is cold (below 65 degrees Fahrenheit). Epoxy cures slower at lower temperatures.
Poor color matching. A seam that is level but a different color from the countertop is almost as noticeable as the original uneven seam. Test your filler color on a scrap piece or in an inconspicuous area first. Mix small batches and adjust the color before committing to the full repair.
DIY vs Professional Repair: Cost Comparison
One of the biggest questions homeowners have is whether to tackle this repair themselves or hire a professional. Here is a straightforward cost breakdown to help you decide.
DIY Repair Costs
For a basic epoxy repair on a stone countertop seam, expect to spend between $40 and $120 on materials. This includes epoxy, diamond hand pads, acetone, painter’s tape, and a few disposable tools. Laminate repair is even cheaper, typically $15 to $40 for seam filler and adhesive. If you need to buy or rent an angle grinder for stone work, add $40 to $80 for a rental or $60 to $150 to purchase one.
Professional Repair Costs
Hiring a countertop repair professional typically costs between $200 and $600 for a single seam repair, depending on your area and the severity of the problem. For complex jobs that require removing and reinstalling part of the countertop, costs can reach $800 to $1,500. Most professionals offer a warranty on their work, which adds value if the repair fails.
When DIY Makes Sense
DIY is the right call when the height difference is under 1/8 inch, the substrate is solid, you have the right material (stone and laminate are most DIY-friendly), and you are comfortable following detailed instructions. The cost savings are significant, and the repair process is straightforward for minor issues.
When to Hire a Professional
Call a pro when the height difference exceeds 1/8 inch, there is visible substrate damage, the seam is in a highly visible area and perfection matters, or you are dealing with a marble or exotic stone that stains easily. Also hire a professional if the original installation is still under warranty. Attempting a DIY repair may void that warranty.
How to Prevent Uneven Countertop Seams in the Future
Once you have fixed your seam, you want it to stay level. Here are the prevention strategies that make the biggest difference over time.
Control moisture at seams near sinks. Water is the enemy of countertop seams, especially laminate. Apply a thin bead of color-matched caulk along the seam where it meets the sink. Wipe up standing water promptly. If your dishwasher vents steam near a seam, consider running the dishwasher with the door slightly open during the drying cycle.
Maintain stable temperature and humidity. Extreme swings in temperature cause stone to expand and contract. Try to keep your kitchen between 60 and 80 degrees Fahrenheit. If you live in a humid climate, running a dehumidifier in the kitchen during summer helps prevent substrate moisture problems.
Inspect seams annually. Once a year, run your hand across every seam in your countertop. If you feel a new lip developing, address it early. A 1/64 inch height difference is easy to fix with a fresh layer of epoxy. Wait until it becomes 1/8 inch and the repair becomes much more involved.
Avoid putting heavy weight on the seam. Standing on countertops, placing extremely heavy appliances directly on a seam, or using a seam as a chopping surface all stress the bond. Keep the seam area clear and treat it gently to extend the life of your repair.
FAQ
How to fix uneven countertop seams?
Start by cleaning the seam and measuring the height difference. For small gaps under 1/16 inch, apply color-matched epoxy or seam filler directly. For larger mismatches, shim the low side level from underneath, then fill the seam with the appropriate adhesive for your material (epoxy for stone, seam filler for laminate, manufacturer adhesive for solid surface). Clamp the joint and let it cure fully before sanding flush.
Can you recut granite after it has been installed?
Yes, granite can be recut after installation, but it requires specialized diamond cutting tools and is generally not a DIY project. For minor seam adjustments, grinding with diamond hand pads is more practical than recutting. For major modifications like adding a cutout or resizing a section, hire a professional fabricator with portable stone-cutting equipment.
How to adjust an irregular edge countertop?
Use diamond hand pads to grind down high spots on stone countertops, working through progressive grits from 100 to 1500. For laminate, use fine sandpaper (220 then 400 grit) by hand. Always work along the edge direction, not across it. Check your progress frequently with a straightedge and stop before you reach the target height to avoid creating a dip.
How to make countertop seams look better?
Use a color-matched filler that blends with your countertop material. For stone, knife-grade epoxy tinted to match the base color works best. For laminate, products like SeamFil come in dozens of colors. Apply slightly more filler than needed, let it cure completely, then sand flush with fine abrasives. A final polish helps the repaired area blend with the surrounding surface.
What to fill countertop seams with?
Use knife-grade epoxy for granite and quartz seams, color-matched laminate seam filler (such as SeamFil) for laminate countertops, and manufacturer-specific solid surface adhesive for materials like Corian. Silicone caulk is acceptable as a temporary moisture barrier but should not be used as the primary seam filler because it lacks the strength to hold the joint together.
How to hide a seam in a countertop?
The key to hiding a seam is precise color matching and careful finishing. Tint your epoxy or filler to match the dominant color of the countertop. Fill the seam slightly proud, let it cure, then sand through progressive grits until flush. For patterned countertops, try to align the seam where a natural pattern break occurs. Running the seam parallel to the grain or veining direction also makes it less noticeable.
How to join countertop seams?
Apply adhesive to both seam edges (epoxy for stone, contact cement for laminate, solid surface adhesive for Corian-type materials). Push the two pieces together tightly, checking alignment with a straightedge. Use seam setters or clamps to hold the joint while the adhesive cures. For stone, suction cup clamps on the surface work well. For laminate, a weighted board pressed across the seam provides even pressure. Follow the adhesive manufacturer’s cure time before removing clamps.
Wrapping Up: Tackle That Seam with Confidence
Learning how to fix an uneven countertop seam with a DIY approach can save you hundreds of dollars and restore the clean look of your kitchen or bathroom. The process comes down to diagnosing the cause, gathering the right materials for your specific countertop type, and following each step carefully without rushing the cure time.
Start with the diagnosis. Measure the height difference, check the substrate, and be honest with yourself about whether the problem is within your skill level to fix. Most seams with less than 1/8 inch of height difference are well within the range of a careful DIYer. For anything more severe, or if you discover water damage underneath, calling a professional is the smarter move.
Take your time with the repair, respect the safety precautions (especially the respirator requirement for stone grinding), and do not skip the progressive sanding and polishing steps. The difference between an amateur-looking fix and a near-invisible repair almost always comes down to patience during the finishing stage.