
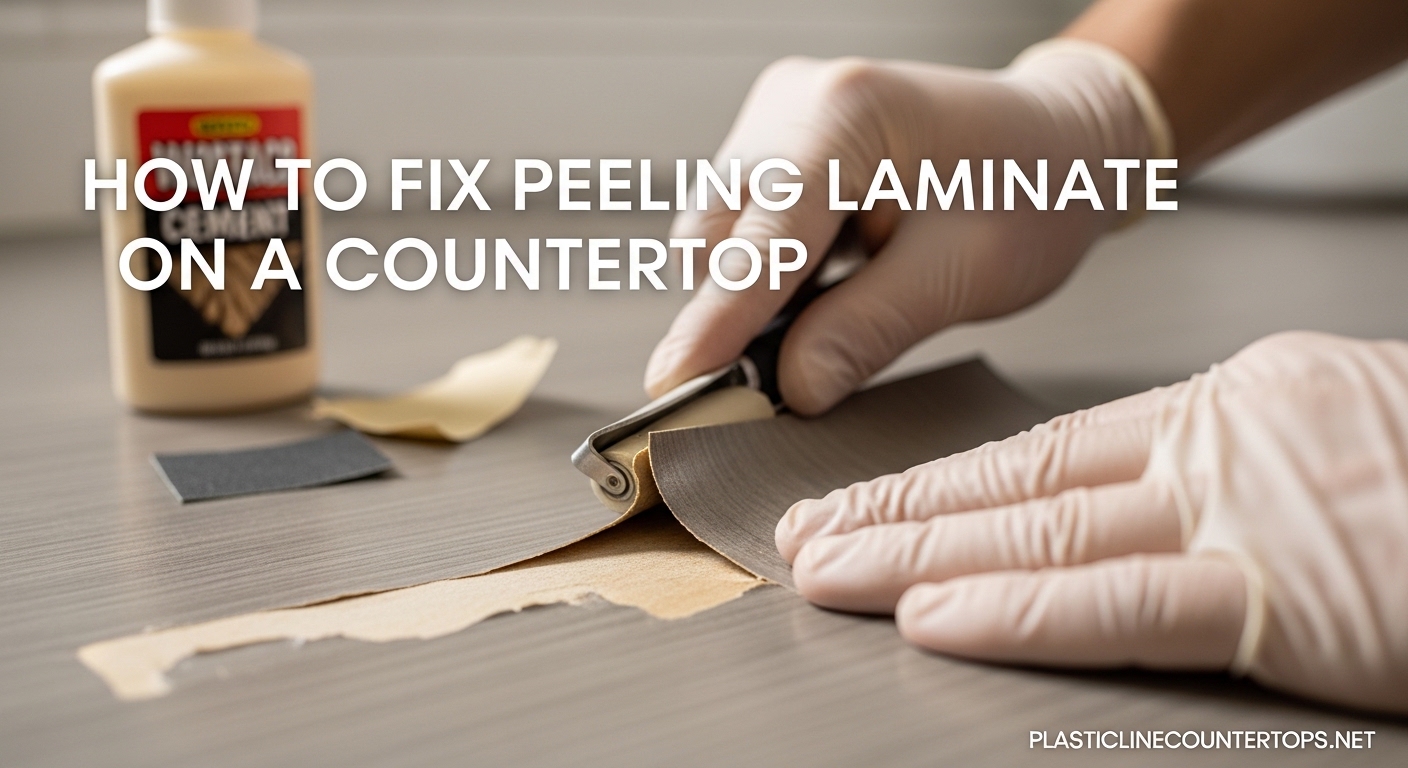
Peeling laminate on a countertop is one of those problems that starts small — a lifted corner here, a bubbling edge there — and quickly turns into an eyesore you notice every single time you walk into the kitchen. The good news? Most of the time, you do not need to rip out the whole countertop and start over. Learning how to fix peeling laminate on a countertop is surprisingly approachable, even if you are not particularly handy around the house.
I have dealt with this exact issue in two different kitchens and an RV, and each time the fix was different but always manageable. The key is understanding why the laminate is peeling, assessing how bad the damage really is, and choosing the right repair method for your situation.
In this guide, we will walk through the three main repair methods, cover the tools you need, and talk about when a repair is worth doing versus when you should start shopping for replacement countertops. I will also share what I learned from doing this myself — including a few mistakes I made along the way so you can avoid them.
Table of Contents
Why Laminate Countertops Peel in the First Place
Laminate countertops peel because the adhesive bond between the decorative laminate sheet and the substrate underneath fails. That substrate is usually MDF (medium-density fiberboard) or particle board, and both materials have a love-hate relationship with moisture.
The most common cause of peeling is water. Every time water seeps into the edge of a laminate sheet — around the sink cutout, along an exposed edge, or through a seam — it weakens the adhesive. Over months and years, that weakened adhesive lets go, and the laminate starts to lift.
Age is another big factor. Contact cement, which is the adhesive most manufacturers use, has a working lifespan. After 15 to 20 years, it simply loses its grip. Heat exposure from appliances, steam from cooking, and even direct sunlight can accelerate this breakdown.
Poor installation is the third major cause. If the original installer did not apply enough adhesive, did not let it get tacky before pressing the surfaces together, or left air voids underneath, those weak spots will eventually peel. I have seen countertops peel after just three years because of a rushed installation job.
Physical impact plays a role too. Dropping heavy objects on the edge, leaning on a corner repeatedly, or sliding appliances across the surface can all break the adhesive seal and start the peeling process.
Assess the Damage: Can Your Countertop Be Saved?
Before you buy a single tube of adhesive, take five minutes to assess whether your countertop is actually worth repairing. This step saves you time and money.
Start by gently lifting the peeling laminate and looking underneath. If the substrate underneath is firm, dry, and intact — meaning it feels solid when you press on it and does not crumble or feel spongy — you are in good shape for a repair. The laminate just needs to be re-glued.
However, if you see any of these warning signs, the repair gets more complicated or may not be worth attempting:
- The MDF or particle board is swollen, soft, or crumbling like wet cardboard
- There is visible mold or a persistent musty smell
- The peeling extends across a large area (more than 30% of the countertop surface)
- Multiple layers are delaminating, not just the top sheet
- The substrate has warped or bowed, meaning the countertop surface is no longer flat
If the substrate is swollen but only in a small area, you can still do a repair. You will just need to scrape away the damaged material, let it dry thoroughly, and fill the void with epoxy putty before reattaching the laminate. I did this on a corner near a sink that had been slowly absorbing water for what looked like years.
One quick test I recommend: press firmly on the substrate with your thumbnail. If it leaves a dent, the material has been compromised by moisture. If it feels hard and resists the pressure, you are clear to proceed with a straightforward re-glue job.
Tools and Materials You Will Need
Gathering everything before you start makes the job go much smoother. Here is what I keep on hand for laminate countertop repair:
Adhesives (choose based on your repair method):
- Contact cement — the gold standard for laminate repair
- Construction adhesive (like Liquid Nails) for larger gaps
- Clear epoxy or cyanoacrylate glue for small chips and edge fixes
- Epoxy putty for filling substrate damage
Tools:
- Heat gun or hair dryer (for reactivating old adhesive)
- Putty knife or scraper (for removing old glue)
- J-roller or wallpaper roller (for pressing laminate flat)
- Bar clamps or heavy books (for applying pressure while curing)
- Fine-grit sandpaper (120 to 220 grit)
- Clean rags and rubbing alcohol
- Popsicle sticks or small dowels (used as spacers during adhesive application)
Safety gear:
- Work gloves
- Safety glasses
- Ventilation mask if using solvent-based contact cement indoors
So, what is the best glue for peeling laminate countertops? Contact cement wins hands down for most situations. It is what manufacturers use, it creates a flexible waterproof bond, and it is widely available at any hardware store. For quick edge fixes where you cannot easily clamp, a high-quality construction adhesive or epoxy also works well.
Method 1: Contact Cement Repair (Best for Edges and Corners)
This is the most reliable method for fixing peeling laminate on a countertop, and it is what I recommend starting with for most situations. Contact cement creates a strong, permanent bond that handles moisture well — exactly what you need in a kitchen or bathroom.
Here is the step-by-step process:
Step 1: Clean both surfaces thoroughly. Gently lift the peeling laminate as far as it will go without forcing it. Use a putty knife to scrape away all the old, dried adhesive from both the back of the laminate and the substrate. Wipe both surfaces with rubbing alcohol on a clean rag to remove any grease, dust, or residue. Let it dry completely.
Step 2: Apply contact cement to both surfaces. Using a small brush or the applicator that comes with the cement, spread an even coat on both the substrate and the back of the laminate. Be generous but not sloppy — you want full coverage without puddles. A technique I picked up from forum discussions is to place popsicle sticks or small dowels between the two surfaces while the cement dries. This prevents them from accidentally touching, because once contact cement touches contact cement, it bonds instantly.
Step 3: Wait for the cement to become tacky. This is the part most people rush. Contact cement needs to dry until it is tacky to the touch but not wet — usually 15 to 30 minutes depending on temperature and humidity. If you press the surfaces together too early, the bond will be weak. Touch the cement with your knuckle; it should feel sticky but not transfer any wet adhesive to your skin.
Step 4: Press the laminate into place. Remove the spacers and carefully press the laminate down onto the substrate, starting from one end and working toward the other to avoid trapping air bubbles. Once it makes contact, you cannot reposition it, so take your time aligning everything.
Step 5: Roll and clamp. Use a J-roller or wallpaper roller to press the laminate firmly from the center outward, squeezing out any trapped air. Apply even, firm pressure across the entire repaired area. For edges and corners, use bar clamps with a scrap piece of wood as a buffer between the clamp and the laminate. Leave clamps in place for at least 4 to 6 hours, though overnight is ideal.
Step 6: Seal the edge. Once the cement has fully cured, run a thin bead of clear silicone caulk along the repaired edge where the laminate meets the substrate. This creates a waterproof barrier that prevents future moisture intrusion. Smooth the caulk with a damp finger and wipe away excess.
This method gives you a repair that can last years — potentially as long as the original installation if done correctly. I repaired a kitchen counter edge using this method three years ago, and it still looks and performs like new.
Method 2: Heat Activation with a Hair Dryer or Iron
If the laminate has only recently started peeling and the original adhesive is still present but has simply lost its grip, heat activation can work as a quicker fix. This method reactivates the old contact cement without adding new adhesive.
This approach works best for recent peeling — think weeks or months, not years. If the old adhesive has fully dried and crumbled, you need Method 1 instead.
Step 1: Clean the area. Wipe both the back of the laminate and the exposed substrate with a damp cloth. Remove any loose debris, but do not scrape away the old adhesive — you need it to still be there for this to work.
Step 2: Apply heat evenly. Set your hair dryer to medium-high heat and hold it 4 to 6 inches from the peeling area. Move it back and forth across the entire section, heating both the laminate and the substrate. If you are using an iron instead, set it to a medium setting with no steam, and place a thin cloth between the iron and the laminate to prevent scorching.
Step 3: Test the adhesive. After about 60 to 90 seconds of heating, gently try to press the laminate back down. If the old adhesive has softened, the laminate should feel tacky and want to stick. If it does not feel sticky at all, the adhesive is too far gone and you need to switch to contact cement.
Step 4: Press and hold. Once the adhesive is tacky, press the laminate firmly into place. Use a roller to apply even pressure across the entire area. Then immediately place heavy objects — books, bricks, or a board with clamps — on top of the repair. Hold the pressure for at least 30 minutes while the adhesive cools and re-bonds.
Step 5: Let it set. Avoid using or touching the repaired area for 24 hours. The reactivated adhesive needs time to reach full strength. Once cured, seal the edge with silicone caulk for added protection.
A word of caution: do not overheat the laminate. Too much heat can scorch the surface, warp the laminate, or damage the pattern. If you smell burning plastic or see discoloration, pull the heat source back immediately. I slightly scorched a bathroom counter this way once, and trust me, a heat mark is harder to fix than peeling laminate.
Method 3: Construction Adhesive and Epoxy for Chips and Gaps
Sometimes the damage goes beyond simple peeling. You might have chips, cracks, or sections where the laminate has broken off entirely. For these situations, construction adhesive and epoxy-based fillers are your best bet.
For missing laminate pieces and large gaps:
Clean the exposed substrate thoroughly and make sure it is completely dry. Apply a bead of construction adhesive to the substrate and spread it with a putty knife. If you still have the broken laminate piece, press it back into place. If the piece is missing, you can fill the void with epoxy putty, smoothing it flush with the surrounding surface.
Clamp or weigh down the repair and let it cure for the manufacturer’s recommended time — usually 24 hours for construction adhesive.
For small chips and edge damage:
Use a clear epoxy or a color-matched laminate repair paste. Many hardware stores sell laminate repair kits that include putty in various colors. You mix the putty to match your countertop color, press it into the chip, smooth the surface with a putty knife, and let it harden.
Forum users consistently recommend a few approaches for small fixes. Clear epoxy works well for hairline cracks and tiny chips because it is nearly invisible once dry. For larger chips, the color-matched repair putty gives a more uniform look, though getting a perfect color match can be tricky.
For filling damaged substrate before re-gluing:
If the MDF or particle board underneath is crumbled or swollen but only in a small area, you need to rebuild the substrate before reattaching the laminate. Scrape away all the damaged, soft material with a putty knife until you reach solid, firm substrate. Let the area dry completely — you can use a hair dryer on low heat to speed this up.
Once dry, fill the void with epoxy putty, pressing it in firmly and smoothing the surface so it is flush with the surrounding substrate. Let the epoxy cure fully, then sand it smooth with 120-grit sandpaper. Now you have a solid surface to re-glue the laminate onto using Method 1.
One thing I learned the hard way: epoxy putty is not flexible once cured. If the repaired area is on a countertop edge that flexes or gets bumped frequently, the repair may crack over time. For high-stress areas, construction adhesive alone (without the rigid epoxy filler) may hold up better.
Sealing and Finishing the Repaired Edges
The repair itself is only half the job. If you skip sealing the edges, moisture will find its way back in and you will be doing this repair again in six months. Sealing is what separates a repair that lasts from one that fails.
Once your adhesive has fully cured, inspect the repaired edge closely. Look for any gaps, even tiny ones, where water could penetrate. Run a thin bead of clear silicone caulk along every seam where the laminate meets the substrate, paying special attention to corners and areas near the sink.
Smooth the caulk with a damp finger or a caulk smoothing tool, and wipe away any excess with a damp cloth before it skins over. Clear silicone is best because it is invisible against most laminate colors and it stays flexible, which means it can handle the slight expansion and contraction that happens with temperature changes.
For edges that took a beating, you might consider replacing the edge banding entirely. Laminate edge strips are available at most home improvement stores and can be cut to size and ironed on over the damaged edge. This gives you a clean, finished look that covers any visible repair work.
If you used epoxy putty for chip repairs and the color does not quite match, you can use a laminate repair marker or touch-up pen to blend the area. These pens come in dozens of colors and cost just a few dollars. They are not perfect, but they make repairs much less noticeable.
Special Considerations: Laminate Repair in RVs
If you own an RV, you already know that laminate countertops peel far more frequently than residential ones. The constant vibration from driving, dramatic temperature swings between day and night, and the thinner, lighter substrate materials used in RV construction all contribute to early adhesive failure.
The repair methods are the same, but there are a few adjustments I recommend for RV countertops.
First, use a flexible adhesive rather than a rigid one. Construction adhesive tends to perform better than contact cement in an RV because it stays slightly flexible after curing, which allows it to absorb vibration without cracking. RV owners on forums consistently report better long-term results with flexible adhesives.
Second, clamp for longer. The constant motion of the RV means the repaired area is under stress almost immediately. If you can, do the repair before a trip and let it cure for a full 48 hours with clamps in place. Park the RV during this time if possible.
Third, seal more aggressively. Use silicone caulk on every edge, not just the repaired one. In an RV, prevention is everything because you cannot easily control the environment. Adding edge sealant to all exposed laminate edges — even ones that are not peeling yet — can buy you years of additional life.
RV countertops also tend to use thinner laminate and lighter substrates, which means you need to be gentler with scraping and sanding. Use a plastic putty knife instead of a metal one to avoid gouging the substrate.
Finally, check all the countertops, not just the one that is peeling. If one section has started to delaminate, the others are likely close behind. Addressing multiple spots in one repair session saves time and adhesive.
When to Repair vs Replace Your Laminate Countertop
Not every peeling countertop is worth fixing. Here is a straightforward framework for making the call.
Repair when:
- The peeling is limited to edges, corners, or small sections
- The substrate is solid and dry with no swelling or crumbling
- The countertop is less than 15 to 20 years old
- The color and pattern are still in good condition on the rest of the surface
- You are working with a limited budget
Replace when:
- The substrate is extensively water-damaged, swollen, or moldy
- More than a third of the countertop surface is delaminating
- The countertop is over 20 years old and the laminate is worn, scratched, or dated
- Multiple seams are opening simultaneously
- You are already planning a kitchen renovation
Can you put new laminate on top of old laminate? Yes, and this is a viable middle-ground option. Laminate resurfacing involves applying a new sheet of laminate directly over the existing surface using contact cement. It costs significantly less than a full tear-out and replacement, and you get a completely fresh surface. The catch is that the existing countertop must be flat, stable, and free of major damage for the new layer to adhere properly.
There are also resurfacing kits — like the Rust-Oleum Countertop Transformations kit — that paint on a new textured finish over your existing laminate. These kits cost a fraction of replacement and can cover up old repairs, scratches, and minor damage. The downside is that the finish is a painted coating, not real laminate, so it is more prone to scratching and may not hold up as well over time.
From a cost perspective, DIY laminate repair runs roughly $20 to $60 in materials. A resurfacing kit costs around $100 to $250 depending on the size of your countertop. Full laminate countertop replacement runs $500 to $3,000 depending on the size of your kitchen, the laminate grade you choose, and whether you hire a professional installer.
How to Prevent Laminate from Peeling Again
Once you have done the repair, you want it to last. Here are the prevention strategies that actually make a difference.
1. Keep edges sealed year-round. Inspect the caulk lines along your sink, backsplash, and exposed edges every six months. If you see any cracks or gaps in the caulk, scrape it out and reapply. This is the single most effective thing you can do to prevent future peeling.
2. Wipe up standing water immediately. Laminate countertops can handle spills on the surface, but standing water near edges and seams is what causes problems. Do not let water pool around the sink or along the backsplash.
3. Use a cutting board, always. Cutting directly on laminate creates tiny scratches that break the surface seal. Over time, those scratches let moisture penetrate to the adhesive layer. A cutting board takes two seconds to grab and saves your countertop.
4. Avoid sliding heavy appliances across the surface. Dropping or dragging a heavy mixer, air fryer, or toaster oven can break the adhesive bond at the edges. Lift appliances to move them, even for small repositioning.
5. Control humidity in your kitchen. Excessive humidity accelerates adhesive breakdown. If your kitchen tends to be humid, use the exhaust fan when cooking and consider running a dehumidifier if condensation regularly appears on surfaces.
6. Protect the area near the dishwasher. The steam and heat from a dishwasher are rough on laminate edges. Make sure the dishwasher is properly sealed where it meets the countertop, and run the vent away from the counter edge if possible.
7. Fix small problems early. A tiny lifted edge takes 15 minutes to fix with contact cement. Ignore it for six months, and you might be dealing with substrate damage that requires hours of work. Early intervention is everything.
FAQ
How do you fix a peeling laminate countertop?
Clean both surfaces, apply contact cement to the laminate back and substrate, wait until tacky (15-30 minutes), press the laminate down firmly, roll out air bubbles, and clamp for 4-6 hours. Seal the edge with silicone caulk once cured.
What is the best glue for peeling laminate countertops?
Contact cement is the best adhesive for laminate countertop repair. It creates a strong, flexible, waterproof bond and is the same adhesive manufacturers use during original installation. For small edge fixes, construction adhesive or clear epoxy also work well.
Can you put new laminate over old laminate?
Yes, you can apply new laminate sheets directly over existing laminate as long as the old surface is flat, stable, firmly bonded, and free of major damage. Use contact cement to bond the new layer. This is a cost-effective alternative to full countertop replacement.
How to restore peeling laminate countertops?
Restoration depends on the damage level. For minor peeling, reactivate old adhesive with a hair dryer and press the laminate back down. For larger areas, scrape off old adhesive, apply fresh contact cement, and clamp. For widespread damage, consider a resurfacing kit or new laminate overlay.
Do laminate countertops peel?
Yes, laminate countertops peel when the adhesive bond between the laminate sheet and the substrate fails. This is most commonly caused by moisture exposure (especially near sinks and edges), age-related adhesive breakdown, poor initial installation, or physical damage to the edges.
What is the average cost to replace a laminate countertop?
Full laminate countertop replacement typically costs between $500 and $3,000 depending on kitchen size, laminate grade, and whether you hire a professional. DIY repair of peeling laminate costs only $20 to $60 in materials, making repair a practical first option whenever the substrate is still in good condition.
Can you use super glue on laminate countertops?
Super glue (cyanoacrylate) can work for very small edge fixes or tiny chips, but it is not recommended as a primary repair adhesive. It dries rigid and brittle, which means it cannot handle the flexing and temperature changes a countertop experiences. Contact cement or construction adhesive will give you a much longer-lasting repair.
Wrapping Up Your Laminate Countertop Repair
Fixing peeling laminate on a countertop comes down to choosing the right method for the damage you are dealing with. For most edge and corner peeling, contact cement gives you a durable, professional-quality repair for under $60 in materials. The heat activation method works great for recent, minor peeling. And epoxy or construction adhesive handles the bigger gaps and chips that the first two methods cannot cover.
The most important takeaway I can share after doing this repair multiple times: do not wait. A small lifted edge is a 30-minute fix. Let that same edge go for a year, and you could be looking at substrate damage that takes an entire weekend to address. Fix it early, seal the edges, and your laminate countertops can last for many more years.
If you found this guide on how to fix peeling laminate on a countertop helpful, start with the simplest method that matches your damage and work your way up only if needed. Most repairs are easier than you expect once you have the right adhesive in hand and a clear plan of attack.