
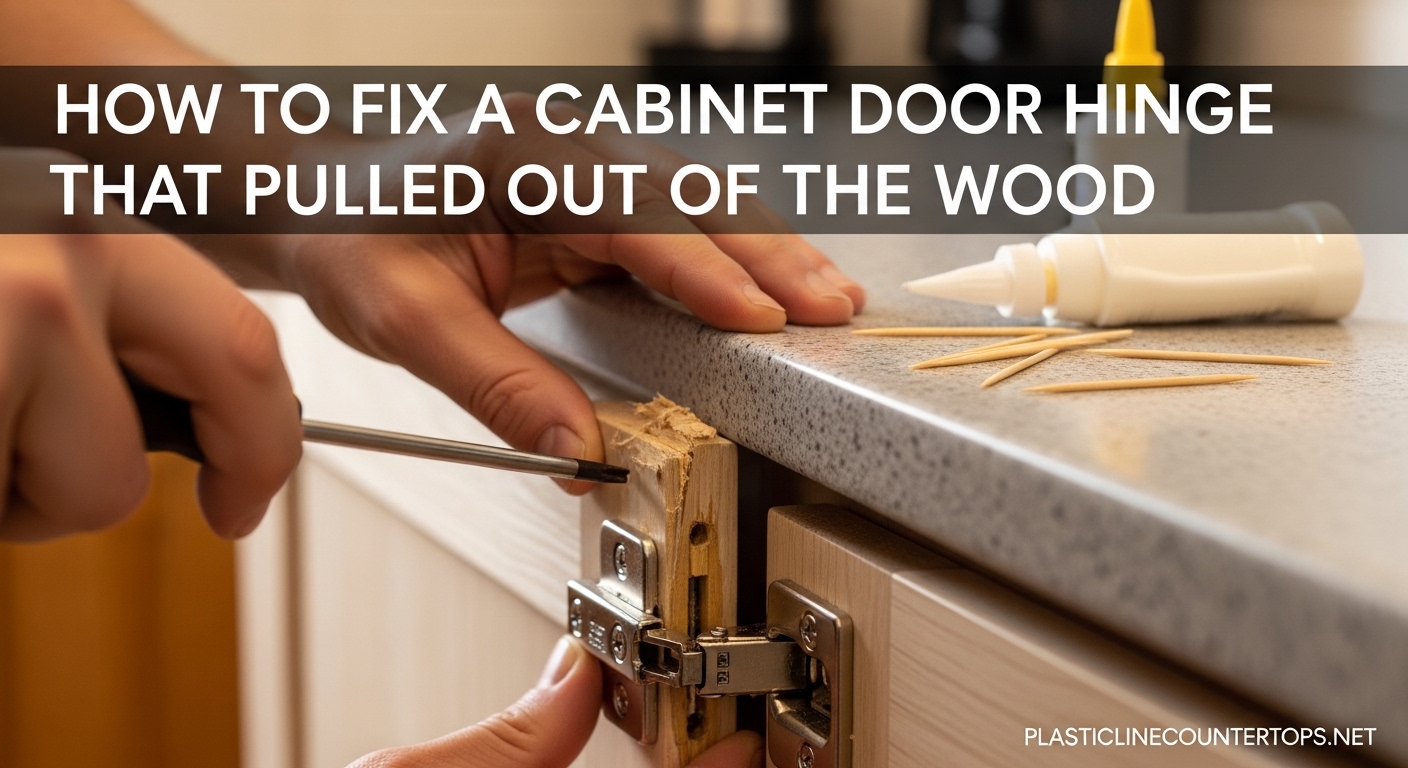
You open a cabinet door and it practically falls off in your hand. The hinge has ripped clean out of the wood, leaving behind stripped, ragged holes where the screws used to be. If you are dealing with this exact problem right now, I have good news: you can fix a cabinet door hinge that pulled out of the wood using nothing more than toothpicks and wood glue in about 15 minutes. I have used this method on kitchen cabinets, bathroom vanities, and even old bookcases, and it holds up surprisingly well.
This guide covers three repair methods ranked from simplest to strongest, plus material-specific advice for particle board, MDF, and solid wood cabinets. Whether the screw holes are slightly loose or completely torn out, one of these approaches will get your door back on its hinges and staying put.
Table of Contents
What You Need Before Starting
Gather your supplies before you start so you are not hunting for things mid-repair. Most of these are common household items, and the rest cost under ten dollars at any hardware store.
For the Toothpick Method (Quick Fix)
You will need wood toothpicks or wooden skewers, wood glue, a small hammer or mallet, a utility knife, and your original hinge screws. That is it. This is the method I reach for first because it takes less than 20 minutes and holds up well on small to medium stripped holes.
For the Dowel Method (Stronger Repair)
Grab a wooden dowel that matches the stripped hole diameter (usually 3/8 inch or 1/2 inch), wood glue, a drill with a matching drill bit, a utility knife or saw, and your original hinge screws. This method creates a solid new anchor point that is often stronger than the original wood.
For the Epoxy/Bondo Method (Heavy Damage)
You need two-part epoxy or Bondo auto body filler (which works far better than standard wood filler on particle board), a putty knife or applicator, sandpaper (120 and 220 grit), and replacement screws. I learned about using Bondo for cabinet repairs from a woodworking forum years ago, and it has become my go-to for badly damaged particle board.
How to Fix a Cabinet Door Hinge That Pulled Out of the Wood
The right repair method depends on how bad the damage is and what material your cabinets are made from. Let me walk you through assessing the damage first, then I will explain each repair method step by step.
Assess the Damage First
Before you start filling holes, take a close look at the damage. You need to understand what you are working with because the repair approach changes depending on severity.
Here is how I evaluate cabinet hinge damage:
- Light damage: The screws spin freely but the holes are mostly intact. The toothpick method works perfectly here.
- Medium damage: The holes are enlarged, the surrounding wood is soft or slightly crumbly, but the overall area around the hinge is solid. The dowel method is your best bet.
- Heavy damage: The wood is torn out, the holes are gouged and irregular, or a chunk of material is missing. Epoxy or Bondo will fill and rebuild the damaged area.
- Beyond repair: If the damage extends across multiple inches, the cabinet side panel is splitting, or the door itself is broken, you may need to replace the door or relocate the hinge to an undamaged area.
One important thing to check: make sure the cabinet frame or door itself is not cracked or warped. If the structural piece is compromised, no amount of hole repair will keep the hinge secure long-term.
Method 1: Toothpicks and Wood Glue (Best for Small Holes)
This is the fastest and most popular DIY fix for a pulled-out cabinet hinge. I have personally used this on at least a dozen cabinet doors over the years, and Reddit users on r/HomeMaintenance and r/fixit consistently recommend it as their first-line solution. It works because the toothpicks pack into the stripped hole and the glue bonds everything into a solid mass that new screws can bite into.
Step 1: Remove the hinge completely from the cabinet. Take out all the screws and set the hinge aside. Clean out any loose wood fragments or old glue from the stripped holes using a toothpick or small brush.
Step 2: Squeeze wood glue directly into each stripped hole. Fill the hole about halfway. You want it coated inside but not overflowing.
Step 3: Push toothpicks into the glued hole, one at a time, packing them in tightly. I usually dip each toothpick in a little extra glue before inserting it. Keep adding toothpicks until the hole is packed solid and you cannot fit any more. For larger holes, wooden skewers work better than standard toothpicks because they fill more volume per piece.
Step 4: Snap or cut off the excess toothpick material sticking out from the surface. A utility knife works well for this. You want the filled hole to be flush with the surrounding wood surface.
Step 5: Let the glue dry completely. Most wood glues need at least 30 minutes to set and 24 hours for full strength. I usually wait at least an hour before reattaching the hinge because I am impatient, but overnight is ideal.
Step 6: Reposition the hinge over the filled holes and drive the screws back in. The screws will cut new threads into the packed toothpick-and-glue material. You should feel solid resistance when the screws grab. If a screw still spins, pack in a few more toothpicks and try again.
Method 2: Wooden Dowel Repair (Best for Medium Damage)
When the stripped holes are too large for toothpicks to fill effectively, a wooden dowel creates a much stronger repair. You are essentially drilling out the damaged hole and replacing it with a solid cylinder of hardwood that gives the screw fresh material to grip.
Step 1: Measure the stripped hole diameter. Choose a wooden dowel that is slightly larger than the original screw hole. For most cabinet hinges with standard screws, a 3/8-inch or 1/2-inch dowel works well.
Step 2: Select a drill bit that matches the dowel diameter. Drill out the stripped hole to a clean, uniform size. Drill straight and to a depth of at least one inch. The goal is to remove all the damaged, stripped-out material and create a clean channel for the dowel.
Step 3: Cut a length of dowel that is slightly longer than the hole depth. Apply a generous coat of wood glue to the outside of the dowel.
Step 4: Tap the glued dowel into the drilled hole using a mallet or hammer. It should fit snugly. If it is too tight, sand the dowel down slightly until it fits. If it is too loose, wrap it in a thin layer of glue-coated paper before inserting.
Step 5: Cut the dowel flush with the surface. A flush-cut saw or a utility knife works. Let the glue dry for at least an hour, ideally overnight.
Step 6: Drill a pilot hole into the center of the dowel. The pilot hole should be slightly smaller than the hinge screw diameter. This prevents the screw from splitting the dowel when you drive it in.
Step 7: Reposition the hinge and drive the screws into the pilot holes in the dowels. The screws should bite firmly into the hardwood dowel and hold tight.
Method 3: Epoxy or Bondo Filler (Best for Heavy Damage)
When the damage is severe and irregular, epoxy or Bondo is the way to go. Regular wood filler is too weak for hinge screws, but two-part epoxy and Bondo auto body filler cure to a hardness that holds screws reliably. DIY Stack Exchange users specifically recommend Bondo over wood filler for particle board cabinets because it bonds better with the compressed wood fibers.
Step 1: Clean out the damaged area completely. Remove all loose wood, old glue, and debris. If there are ragged edges, trim them back to solid material. The cleaner the surface, the better the epoxy will bond.
Step 2: If there is a large gap or missing chunk, you can place a small piece of scrap wood behind the damaged area as backing material. This gives the filler something to press against and reduces the amount of filler needed.
Step 3: Mix your epoxy or Bondo according to the package directions. Work quickly because both products have a limited working time (usually 5 to 10 minutes). I prefer Bondo for particle board because it cures harder and faster than standard wood epoxy.
Step 4: Press the filler into the damaged area using a putty knife. Overfill slightly because the filler will shrink as it cures. Make sure the filler packs into every crack and crevice of the damaged hole.
Step 5: Let the filler cure completely. Bondo sets in about 20 minutes and can be sanded in 45 minutes. Two-part epoxy typically needs 24 hours. Check the manufacturer instructions for exact curing times.
Step 6: Sand the filled area smooth and flush with the cabinet surface. Start with 120-grit sandpaper and finish with 220-grit for a smooth surface. The area should be flat enough for the hinge plate to sit flush.
Step 7: Drill pilot holes where the new screws will go. Make the pilot holes slightly smaller than the screw diameter. Then reposition the hinge and drive the screws into the cured filler. The screws should grip tightly.
Repair Advice by Cabinet Material
The material your cabinets are made from makes a big difference in which repair method works best and how long the repair will last. I have worked on all three common cabinet materials, and each one behaves differently when a hinge pulls out.
Particle Board (Most Common, Most Fragile)
Particle board is the material most likely to have this problem in the first place. It is made from compressed wood chips and adhesive, which means it crumbles easily and does not hold screws well. If your hinge pulled out of particle board, the hole is probably enlarged and surrounded by soft, powdery material.
For particle board, I recommend the epoxy or Bondo method as the first choice. Toothpicks and glue can work for minor stripping, but particle board fibers tend to crumble further under stress. Bondo bonds with the compressed particles and creates a much harder anchor point. If you use the toothpick method, use lots of extra glue and give it a full 24 hours to cure before reinstalling the hinge.
Avoid the dowel method on thin particle board panels because drilling can weaken the surrounding area further. If the panel is less than 1/2 inch thick, epoxy is really your only reliable option.
MDF (Medium Density Fiberboard)
MDF is denser and more uniform than particle board, which makes it slightly better at holding screws. However, MDF still struggles with repeated screw insertion and removal. When a hinge pulls out of MDF, the hole usually stays relatively clean but becomes enlarged.
All three methods work on MDF. The toothpick method handles light damage well. The dowel method is my preferred choice for MDF because you can drill clean holes without the material crumbling. Epoxy works too, but it is usually overkill unless the damage is significant.
Solid Wood
Solid wood cabinets are the easiest to repair because the wood has natural grain that holds screws and fillers well. When a hinge pulls out of solid wood, it usually leaves a clean hole that is simply enlarged.
The toothpick method is almost always sufficient for solid wood. The wood glue bonds well with the natural grain, and the packed toothpicks create a solid anchor. For larger holes, the dowel method is straightforward because you can drill clean, precise holes in solid wood without any crumbling. Solid wood repairs tend to be the longest-lasting because the surrounding material is strong and stable.
How to Reinstall the Hinge Properly
Once you have repaired the screw holes, reinstalling the hinge correctly is just as important as the repair itself. A poor reinstallation job will cause the same problem all over again within weeks.
Always drill pilot holes before driving screws into repaired material. The pilot hole should be about 70% of the screw diameter. This prevents the repair material from splitting and gives the screw threads something to cut into. I see people skip this step all the time, and it is the number one reason repairs fail prematurely.
Use the correct screw size. If your original screws were short (under 1 inch), consider upgrading to slightly longer screws for the repair. Longer screws reach deeper into the repaired material and hold better. Just make sure the screws are not so long that they poke through the other side of the cabinet panel.
Do not overtighten. Drive the screws until they are snug and the hinge sits flat against the surface, then stop. Cranking down hard on the last quarter turn is what strips holes in the first place. With repaired holes, this is especially important because the filler material can crack under excessive pressure.
Check alignment before final tightening. Hold the cabinet door in place and make sure it lines up with the surrounding doors before you tighten all the screws. This is much easier to adjust when the screws are slightly loose than after everything is locked down.
How to Prevent Cabinet Hinges From Pulling Out Again
Repairing a pulled-out hinge is one thing. Making sure it never happens again is even better. Here are the prevention strategies I have found most effective.
Install hinge repair plates. These are small metal plates that mount behind the hinge and distribute the load across a larger area. They cost a few dollars and take about five minutes to install. If your cabinets are made from particle board, I strongly recommend adding repair plates during your fix.
Avoid hanging heavy items on cabinet doors. I have seen people hang dish towels, oven mitts, and even grocery bags from cabinet door handles. The constant downward pull stresses the hinge screws and gradually works them loose. Keep the doors for opening and closing only.
Check and tighten hinge screws annually. Set a reminder to go through your kitchen and bathroom cabinets once a year and snug up any loose hinge screws. Catching a loose screw early takes ten seconds and prevents a pulled-out hole that takes an hour to fix.
Use threaded inserts for high-use cabinets. If you have a cabinet door that gets opened and closed dozens of times per day, consider installing threaded metal inserts into the screw holes. The inserts bite into the wood from the inside and provide metal threads for the screws, making a much stronger connection than wood alone.
Lubricate hinges to reduce friction. Stiff hinges force you to pull harder on the door, which puts more stress on the screws. A quick spray of silicone lubricant or a drop of machine oil on each hinge once a year keeps them moving smoothly and reduces the strain on the mounting screws.
FAQ
How to repair a cabinet door that has pulled off?
Remove the hinge and clean out the stripped screw holes. Fill each hole with wood glue and packed toothpicks, let it dry for at least an hour, then drive the screws back into the filled holes. For larger damage, drill out the holes, glue in wooden dowels, and drive screws into the dowels after drilling pilot holes.
How to fix a door hinge that has come off?
Start by cleaning the damaged screw holes. For small holes, pack them with toothpicks and wood glue, let dry, and reattach the hinge. For bigger holes, drill them out and insert glued wooden dowels. For severe damage on particle board, use Bondo or two-part epoxy to fill and rebuild the area, then drill pilot holes and reattach the hinge.
How do I tell what kind of cabinet hinge I have?
Look at how the hinge attaches to the cabinet. Euro or concealed hinges mount inside a 35mm cup drilled into the door and are invisible when closed. Face-frame hinges have two flat plates joined by a pin and mount on the outside surface. Wrap-around hinges have one arm that wraps around the cabinet edge. Measure the hole pattern and compare with examples online to identify your specific type.
How to put a cabinet door hinge back on?
After repairing the stripped holes, position the hinge plate over the filled holes and insert the screws. Always drill pilot holes first to avoid splitting the repair material. Tighten screws until snug but do not overtighten. Test the door swing and alignment, then make small adjustments by loosening and repositioning the hinge before final tightening.
Wrapping Up
Fixing a cabinet door hinge that pulled out of the wood is a straightforward repair that most homeowners can handle in under an hour. The toothpick and wood glue method solves the majority of cases, while wooden dowels and epoxy filler handle the tougher damage. The key is matching the repair method to the severity of the damage and the type of material your cabinets are made from.
Take the extra time to drill pilot holes and avoid overtightening when you reinstall the hinge. Those two habits alone will prevent most future pullouts. And if your cabinets are particle board, consider adding repair plates for extra insurance. Your cabinet doors will thank you.