
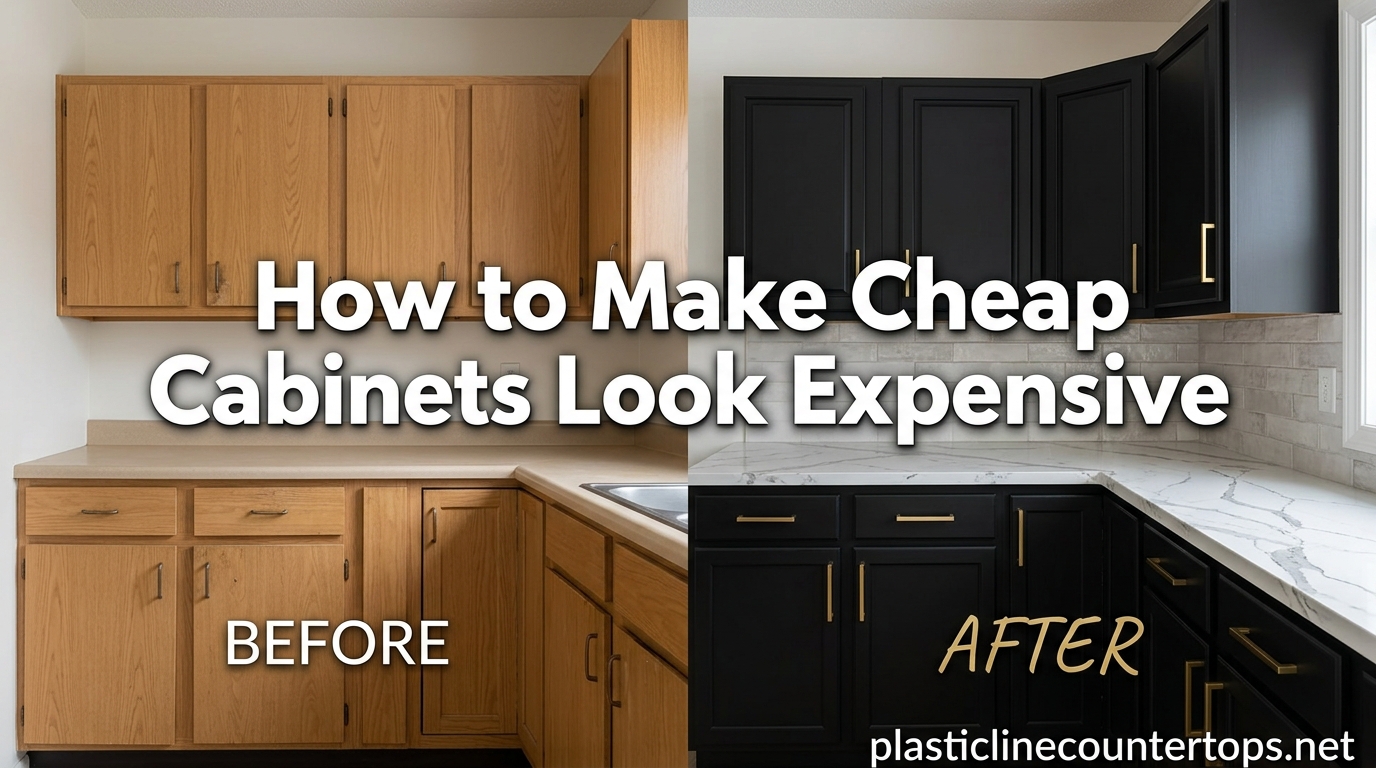
Stock cabinets and builder-grade cabinets look cheap when they leave the factory. But after 15 years of updating homes on tight budgets, I have learned that a few strategic upgrades can make cheap cabinets look expensive without replacing them. Whether you have basic white cabinets from Home Depot or flat-front builder cabinets, these DIY techniques can transform your kitchen for a fraction of custom cabinet costs. In this guide, I will show you exactly how to make cheap cabinets look expensive using techniques that professional contractors charge thousands for, but you can do yourself over a weekend.
Table of Contents
Paint Cabinets Like a Pro
Paint is the single most impactful upgrade for cheap cabinets. A fresh coat of color can completely change the look of your kitchen, and when done correctly, it rivals custom cabinet finishes. The key is proper preparation, which most DIY tutorials skip.
Proper Prep: Degrease and Sand
Grease buildup is the main reason paint peels off cabinets. I always clean cabinets twice with TSP (trisodium phosphate) to remove all residue before sanding. After cleaning, I lightly sand with 220-grit paper to rough up the surface so the primer adheres properly. This step takes extra time but prevents peeling for years.
Bonding Primer Essentials
Thermofoil and laminate cabinets have slick surfaces that regular primer cannot grip. You need a bonding primer like BIN Shellac or a dedicated cabinet primer. I have tested dozens of primers, and the bonding type prevents peeling even on the smoothest thermofoil doors. Apply two thin coats, letting each dry completely between applications.
Spray vs Brush Technique
Spray painting delivers the smoothest finish but requires equipment. A Wagner paint sprayer costs around $150 and produces factory-quality results. Brush application works if you use a high-quality brush and apply thin coats with light sanding between layers. I prefer spray for cabinet doors and brush for inside frames.
Two-Tone Paint Technique
Two-tone cabinets create a custom look that rivals high-end design. Paint base cabinets one color (like deep blue or forest green) and upper cabinets white or cream. The contrast adds visual interest and makes your kitchen look professionally designed. This technique works particularly well in spaces with neutral walls.
Upgrade Hardware with Statement Pieces
Hardware is like jewelry for your cabinets. Swapping generic builders-grade knobs for statement hardware instantly elevates the entire look. This is the cheapest upgrade with the biggest visual impact.
The 1-3 Rule for Hardware Sizing
Professional designers follow the 1-3 rule for cabinet hardware. Drawer pulls should be one-third the width of the drawer, and cabinet pulls should be proportional to the door size. For most standard cabinets, that means 6-8 inch pulls for drawers and 3-4 inch knobs for doors. Oversized hardware makes a bold statement while undersized hardware looks cheap.
Finish Options: Matte Black, Brass, Nickel
Matte black hardware hides fingerprints and works with almost any color scheme, which explains its popularity in modern kitchens. Warm brass adds character to traditional spaces, while brushed nickel offers a timeless upgrade. I recommend ordering samples before committing because finish changes everything about how the hardware feels in your space.
Placement Tricks for Custom Look
Centering hardware properly makes cabinets look custom-made. Standard placement places knobs 1-2 inches from the bottom corner on doors and centered on drawers. If your existing holes do not align with your new hardware, use wood filler to fill old holes and drill fresh ones. This takes patience but creates a seamless look.
Add Crown Molding and Trim
Crown molding transforms basic cabinets into custom built-ins. The gap between your cabinets and ceiling is a telltale sign of cheap cabinets, and filling it with molding creates a polished, built-in appearance that impresses buyers and guests alike.
Molding Profiles and Styles
Simple ogee or cove molding profiles work best for DIY installation. Softer profiles hide imperfect cuts better than sharp details. Measure your cabinet height and choose molding that proportions well with your space. Larger crowns make a bolder statement, but the molding should complement your kitchen style rather than overwhelm it.
DIY Installation Tips
Cut molding at 45-degree angles using a miter saw for inside corners and 45-22.5 degree combinations for outside corners. I always dry-fit pieces before applying adhesive to ensure clean joints. Use paintable caulk to fill tiny gaps between the molding and cabinet, which creates a seamless appearance that looks professionally installed.
Light Rail Option
Light rail molding runs along the bottom of your upper cabinets, creating a finished look when under-cabinet lighting is installed. This detail adds architectural interest and hides the transition between the cabinet and any LED strips you add later. Most home improvement stores carry light rail options in pre-finished white that matches common cabinet colors.
Install Under-Cabinet Lighting
Lighting transforms the ambiance of your kitchen while making your counters more functional. Under-cabinet lighting creates a premium feel that buyers notice immediately, and modern LED options make this upgrade surprisingly affordable.
LED Strip Lights vs Puck Lights
LED strip lights provide even illumination across the entire backsplash area, while puck lights create focused pools of light. I prefer strip lights because they eliminate dark spots and look more integrated. RGB strip lights offer color options, but warm white (3000K) creates the most inviting atmosphere for kitchens.
Warm vs Cool Temperature
Temperature measured in Kelvin determines the color of your lighting. Warm white (2700K-3000K) mimics incandescent bulbs and creates cozy atmosphere. Cool white (4000K-5000K) appears crisper and brighter, which works well for task lighting. I recommend warm white for living areas and neutral white for workspaces where color accuracy matters.
Hardwire vs Plug-In
Hardwired lighting requires electrical work but creates the cleanest look with no visible cords. Plug-in options install in minutes with adhesive backing or mounting clips. For most DIY projects, plug-in LED strips with a dimmer switch offer the best balance of professional appearance and easy installation. Battery-powered options work in areas without nearby outlets.
Upgrade Soft-Close Hinges and Drawer Slides
Soft-close hardware feels luxurious every time you close a cabinet door. This upgrade addresses one of the biggest complaints about cheap cabinets: doors that slam shut. Installing soft-close hinges costs $3-8 per hinge, but the daily experience improvement is remarkable.
Soft-Close Hinge Benefits
Soft-close hinges use hydraulic mechanisms to slow door closure during the last inch of movement. This prevents slamming, protects the cabinet door from damage, and creates a premium feel that impresses everyone who uses your kitchen. Most existing cabinets can accept soft-close hinges with minor hinge plate adjustments.
Full-Extension Drawer Slides
Builder-grade cabinets often have partial-extension drawer slides that limit access to drawer contents. Upgrading to full-extension slides lets you pull drawers completely out, making organization easier and accessing items in the back simple. Blum soft-close slides represent the gold standard, but less expensive options from danco and amerimax work well for budget projects.
DIY Installation
Soft-close hinges install directly to existing cabinet frames with just a screwdriver. The mounting plates attach to the same screw holes as standard hinges, making this a true drop-in replacement. Drawer slides require measuring and drilling, but a basic drill and stud finder handle the job. Plan for 30-45 minutes per cabinet when installing drawer slides yourself.
Extend Cabinets to the Ceiling
The gap between your upper cabinets and ceiling collects dust and screams cheap. Filling this space creates the custom built-in look that makes kitchens appear expensive and intentional. Several approaches work depending on your budget and skill level.
Filler Pieces and Scribe Molding
Closetmaid filler pieces bridge gaps up to 6 inches between cabinets and walls. Scribe molding covers uneven edges where cabinets meet walls. These pieces cost $10-30 each and install in minutes with wood glue and finishing nails. The result looks custom because it eliminates the gap that makes cabinets look incomplete.
Decorative Corbels and Columns
Adding corbels at the top corners of cabinets creates an upscale appearance without major construction. Wooden corbels cost $20-40 each and mount with screws hidden behind wood filler. Columns on either side of a refrigerator surround create a built-in look that impresses visitors and potential buyers.
Add Detail to Plain Cabinet Doors
Flat-front cabinet doors date a kitchen immediately. Adding trim details transforms basic doors into Shaker-style or raised-panel designs that look custom-made. This technique works especially well on builder-grade thermofoil doors that cannot be painted.
Board and Batten Style Updates
Board and batten treatments add horizontal rails to flat cabinet doors. Cut 1×3 or 1×4 trim pieces to fit between the door stiles, attach with wood glue and finishing nails, then fill nail holes and paint. This treatment costs under $50 for an entire kitchen and creates a farmhouse aesthetic that remains popular.
Frame Additions for Shaker Style
Attaching pre-made Shaker door frames to existing flat doors creates authentic raised-panel appearance. Companies like Knez sell conversion frames that attach directly to your existing doors. This approach requires painting but creates a genuine Shaker look that stands up to scrutiny from anyone who knows quality cabinetry.
Organize and Declutter for Instant Impact
Before investing in any upgrades, declutter your cabinets and drawers. Organized cabinets look expensive because they suggest the entire kitchen operates at a high level. Drawer organizers, shelf risers, and cabinet lighting transform how you experience your space daily.
Drawer Dividers and Organizers
Custom drawer dividers keep utensils, tools, and gadgets organized. Bamboo organizers cost $15-30 per drawer and fit standard sizes. Deep drawers benefit from vertical dividers that keep cutting boards and baking sheets upright and accessible.
Vertical Shelf Risers
Double your cabinet storage capacity with wire or acrylic shelf risers. These let you stack items in two layers, making everything accessible without digging through piles. Rev-a-shelf makes high-quality risers that fit most standard cabinets.
FAQ
How to make cheap cabinets look more expensive?
Paint cabinets with proper prep, upgrade hardware to statement pieces (6-8 inch pulls), add crown molding to fill ceiling gaps, install under-cabinet LED lighting, and upgrade soft-close hinges. These DIY upgrades cost $200-600 total but create a custom kitchen appearance worth thousands more.
What is the 1-3 rule for cabinets?
The 1-3 rule means drawer pulls should be approximately one-third the width of the drawer. For standard 15-18 inch drawers, that means 5-6 inch pulls. Cabinet knobs should be proportional at 1-2 inches, positioned 1-2 inches from the bottom corner of doors.
How to elevate cheap cabinets?
Elevate cheap cabinets by painting them with a two-tone scheme, adding oversized hardware in on-trend finishes like matte black or brass, installing crown molding to the ceiling, adding under-cabinet lighting, and replacing standard hinges with soft-close models. Each upgrade costs under $100 but dramatically improves appearance.
Are white kitchens out in 2026?
White kitchens remain popular but are evolving toward warmer whites and two-tone schemes. Rather than all-white cabinets, consider painting base cabinets a saturated color (deep blue, forest green, or charcoal) while keeping upper cabinets white or cream. This approach keeps the bright kitchen feel while adding visual interest.
What is the biggest mistake when painting cabinets?
Skipping proper surface prep is the biggest mistake. Cabinets must be degreased thoroughly with TSP, lightly sanded, and dried before any primer goes on. Using regular primer on thermofoil or laminate cabinets causes peeling within months. Bonding primer costs only $10 more per quart but prevents catastrophic failure.
Start With the Upgrades That Match Your Budget
You do not need to do all of these upgrades at once. Start with paint and hardware if your budget is tight, since those two changes deliver the biggest visual impact for the smallest investment. Add crown molding and lighting when funds allow, and upgrade hinges and drawer slides as you use the kitchen and notice the daily frustration of slamming doors.
The beauty of making cheap cabinets look expensive is that every upgrade pays for itself through increased home value and daily enjoyment. A kitchen that cost $15,000 to replace can be transformed for $500-1000 with these techniques. The difference between cheap stock cabinets and custom cabinetry is often just sweat equity and strategic decisions about where to spend your improvement budget.
If you have questions about specific techniques or need help planning your cabinet upgrade project, the methods in this guide have worked across multiple homes and renovation projects. Start with the upgrade that excites you most and build from there.