
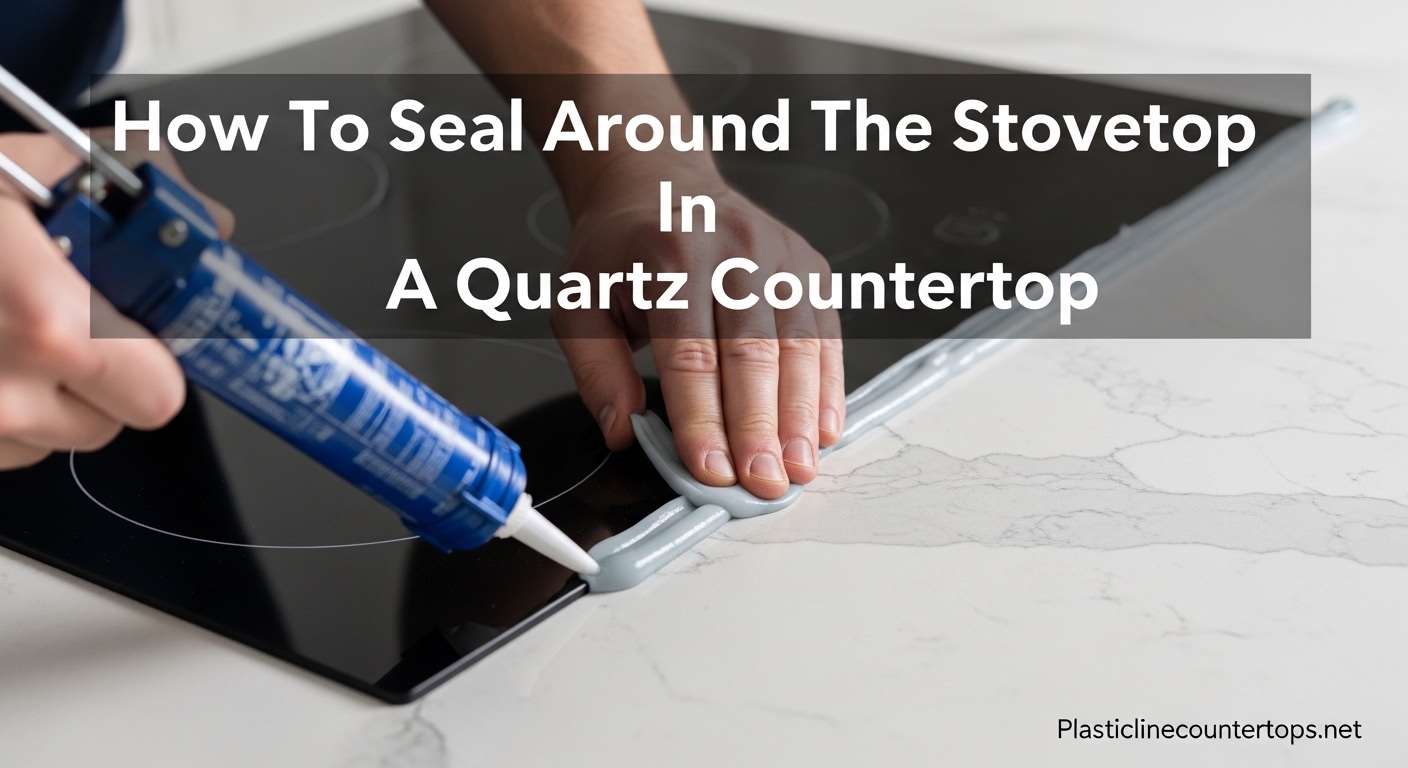
If you have a drop-in cooktop or glass stovetop sitting in a quartz countertop, you have probably noticed a thin gap around the perimeter. That gap might not look like much, but it is an open invitation for spills, grease, and crumbs to work their way underneath your countertop and into the cabinetry below. Learning how to seal around the stovetop in a quartz countertop is one of those small kitchen maintenance tasks that prevents expensive damage down the road.
The good news is that this is a straightforward project you can handle in an afternoon with the right materials. In this guide, I will walk you through the entire process from start to finish, including which sealant to use, how to apply it cleanly, and even how to remove a cooktop that has already been sealed if you ever need to make repairs.
Whether you are installing a new induction cooktop, replacing an old seal that has cracked, or dealing with a tiny 5x4mm gap that foam tape cannot fill, this guide has you covered. I have pulled together advice from professional installers, manufacturer guidelines, and real homeowner experiences to give you the most complete resource available.
Table of Contents
Why Sealing Around Your Stovetop Matters
That narrow gap between your cooktop and quartz countertop is more than a cosmetic issue. Every time you boil over a pot, wipe down the counter, or spill something near the stove, liquid seeps into that opening. Over weeks and months, that moisture travels down into the cabinet below, potentially warping wood, feeding mold growth, and corroding any electrical or gas connections hidden beneath the cooktop.
Food debris is just as problematic. Crumbs and grease particles collect in the gap, attracting pests and creating a stubborn grime that is nearly impossible to clean without removing the cooktop entirely. I have seen homeowners spend hundreds on pest control calls that traced back to an unsealed cooktop gap.
Sealing also serves a mechanical purpose. The right sealant cushions the cooktop where it rests on the quartz edge, absorbing vibrations and preventing the glass or metal rim from directly pressing against the stone. Without that cushion, thermal expansion and everyday cooking vibrations can stress the quartz edge, potentially leading to chips or cracks over time.
Finally, a proper seal keeps the cooktop secured in its opening. This prevents shifting that could strain gas lines or electrical wiring connections beneath the surface. For induction cooktops in particular, movement can interfere with the magnetic coil alignment and reduce cooking performance.
Materials You Need for This Job
Before starting, gather all your materials. Having everything ready means you can work quickly and remove the masking tape before the silicone starts to skin over, which is a timing detail many first-timers miss.
The sealant: Use a heat-resistant 100% silicone caulk rated for high temperatures. RTV (Room Temperature Vulcanizing) silicone is the professional standard for this application. Look for a product that contains mildewcide if your kitchen tends to be humid, as this prevents mold growth in the sealed joint. Clear or color-matched silicone works best for quartz countertops.
Tools and supplies:
- Masking tape or high-quality painter’s tape (1-inch width)
- Caulking gun
- Isopropyl alcohol (70% or higher) and clean rags
- Utility knife with a fresh blade
- Paper towels for cleanup
- A putty knife or plastic scraper for removing old sealant
Avoid latex caulk, acrylic caulk, or any paintable caulking product. These materials cannot handle the heat radiating from a cooktop and will crack, shrink, or pull away from the surface within weeks. I have seen this mistake happen repeatedly on kitchen forums, and the result is always the same: a failed seal and a do-over.
How to Seal Around the Stovetop in a Quartz Countertop: Step-by-Step
This is the core process. Follow these steps in order, and do not rush. The entire job takes about 30 to 45 minutes of active work plus 24 hours of cure time before you can use the stove again.
Step 1: Remove the Cooktop and Clean the Surface
Turn off power to the cooktop at the breaker panel. If you have a gas cooktop, shut off the gas supply valve as well. Carefully lift the cooktop out of the countertop opening. Most drop-in cooktops have spring clips underneath the rim that hold them in place. Gently pry these clips back while lifting.
Once the cooktop is out, clean the quartz edge and the underside of the cooktop rim with isopropyl alcohol. This removes grease, dust, and any residue from the old sealant. The surface must be completely dry before you proceed. Any moisture or oil left on the surface will prevent the silicone from bonding properly.
If there is old silicone remaining on the quartz, use a plastic scraper or the edge of a putty knife to remove it. A utility knife can help with stubborn bits, but work carefully to avoid scratching the quartz surface.
Step 2: Apply Masking Tape to Both Surfaces
This is the step that separates a professional-looking result from a messy one. Apply masking tape along the top edge of the quartz countertop, about 1/8 inch back from the inside edge of the cutout. Then apply a second strip of tape along the underside rim of the cooktop, about 1/8 inch from the outer edge.
The tape creates a clean boundary line. When you remove it later, you get a sharp, even caulk line instead of a ragged edge. Press the tape down firmly so silicone cannot seep underneath it.
Step 3: Apply Heat-Resistant Silicone in Clumps
This is the technique that professional installers use and that most DIY guides get wrong. Do not run a continuous bead of caulk around the entire perimeter. Instead, apply hazelnut-sized clumps of silicone every 5 to 6 inches along the quartz edge where the cooktop will rest.
The clump method serves two purposes. First, it cushions the cooktop and allows for slight height adjustments when you set it back into the opening. Second, if you ever need to remove the cooktop for repairs, the clumps are far easier to break through than a solid ring of silicone. A continuous bead essentially glues the cooktop to the countertop permanently.
Use enough silicone in each clump so that when the cooktop is lowered into place, the silicone compresses slightly and fills the gap between the cooktop rim and the quartz edge. You want it to squeeze out just a little, not overflow.
Step 4: Lower the Cooktop Into the Opening
Carefully lower the cooktop straight down into the cutout. Do not slide it in at an angle, as this can smear the silicone onto visible surfaces. Once the cooktop is seated, press down gently and evenly around all four sides to compress the silicone clumps.
Do not over-tighten any mounting brackets or clips. Professional installers specifically warn against cranking down on these fasteners because excessive pressure can crack the quartz edge. The silicone provides both the seal and the cushion, so you only need the clips snug enough to hold the cooktop in position.
Step 5: Remove the Tape Before the Silicone Skins Over
This is a critical timing step. Silicone caulk begins to form a skin on its surface within 10 to 15 minutes of application, depending on humidity and temperature. You must remove the masking tape before this happens.
Peel the tape away from the countertop edge slowly and at a 45-degree angle. Do not pull straight up, as this can lift the fresh silicone with it. If any silicone squeezed out past the tape line, use a damp finger or a caulk smoothing tool to press it back into the joint before the tape comes off. Wipe any excess off the quartz surface immediately with a paper towel dampened with alcohol.
Step 6: Let the Silicone Cure for 24 Hours
Leave the cooktop undisturbed for a full 24 hours. Most heat-resistant silicone products reach full cure in 24 hours at room temperature. Avoid cooking, cleaning, or placing heavy objects on the stovetop during this window. The seal needs time to reach its full flexibility and adhesion strength.
Once cured, the silicone forms a durable, heat-resistant, watertight gasket that will last for years. Check the seal periodically during routine cleaning. If you notice cracking or pulling away from the surface, it is time to remove the old seal and repeat this process.
Quartz-Specific Considerations
Quartz countertops are engineered from roughly 90 to 95 percent ground quartz stone bound together with resin and polymers. Unlike granite or marble, quartz is non-porous, which means it does not absorb liquids and does not require a penetrating sealer on its surface.
This confuses many homeowners who ask whether they need to seal their quartz countertop before caulking around the cooktop. The answer is no. The sealant goes between the cooktop rim and the quartz edge, not onto the quartz surface itself. You are creating a gasket, not sealing the stone.
One important consideration: some cooktop manufacturers explicitly state that their products should not be sealed to the countertop. They argue that the built-in gasket or foam strip on the cooktop rim provides adequate sealing, and adding silicone makes future removal difficult. Read your cooktop’s installation manual before deciding. If the manufacturer recommends against sealing, you may want to use a foam mounting tape or the cooktop’s factory gasket instead.
For quartz surfaces specifically, choose a silicone color that blends with your countertop. Clear silicone works on most quartz patterns, but if you have a solid white or dark quartz slab, an almond or dark-colored silicone will look cleaner over time because it hides any minor discoloration that can occur with age and cooking residue.
Solutions for Small Gaps Between Cooktop and Counter
Not every cooktop-to-countertop gap is the same size. I have seen homeowners on Reddit and DIY forums struggling with tiny gaps, sometimes as small as 5x4mm, where standard foam sealant strips are too thick to fit. If this sounds like your situation, you have a few options.
For narrow gaps under 5mm, skip the foam tape entirely and apply a thin bead of heat-resistant silicone directly to the quartz edge before setting the cooktop in place. The silicone will compress to fill whatever space exists, even a very narrow one. Use less product than you would for a standard gap, and apply it as a thin ribbon rather than large clumps.
Another option for small gaps is double-sided foam mounting tape. This material comes in various thicknesses, including thin 1mm and 2mm versions that fit into tight spaces. It provides both a seal and a cushioning layer. However, foam tape is much harder to remove than silicone if you ever need to service the cooktop.
For induction cooktops that have a built-in rubber gasket but still show a slight gap, a thin silicone bead applied on top of the factory gasket can fill the remaining space. This is a common approach recommended by appliance installers on professional forums.
How to Remove a Cooktop That Has Been Sealed With Silicone
Someday you may need to remove your cooktop for repair, replacement, or to access the wiring underneath. If the cooktop was sealed with silicone, breaking that seal without damaging the quartz takes patience and the right technique.
The dental floss method: This is the most recommended approach on DIY forums, and for good reason. Take a length of unwaxed dental floss and wrap the ends around your fingers, the same way you would for flossing your teeth. Slide the floss into the gap between the cooktop rim and the quartz edge, then work it back and forth along the entire perimeter in a sawing motion. The floss cuts through the silicone cleanly without scratching the quartz. This method works especially well on the clump-style application described earlier in this guide.
The extendable blade knife method: If the silicone is thick or has fully cured for years, dental floss might break. In that case, use an extendable blade utility knife. Extend the blade to the length you need and carefully run it along the seam between the cooktop and countertop. Keep the blade angled away from the quartz surface to prevent scratching. Snap-off blade knives work well here because you can extend a fresh, sharp section for each side of the cooktop.
Regardless of which method you use, work slowly. Rushing is how quartz edges get chipped. Once the seal is broken, lift the cooktop gently. If it feels stuck in one spot, do not force it. Go back and cut any remaining silicone in that area before trying again.
After removal, clean all residual silicone off the quartz edge with alcohol and a plastic scraper before reapplying fresh sealant.
Common Mistakes to Avoid
After reading through dozens of forum posts and professional installer discussions, I have identified the mistakes that come up most often. Avoid these and your seal will last for years.
Using the wrong type of caulk. Latex, acrylic, and polyurethane caulks cannot handle cooktop-level heat. They crack and shrink within weeks. Always use 100% silicone rated for high temperatures.
Running a continuous bead of silicone. A solid ring of silicone around the cooktop perimeter creates a permanent bond that makes future removal extremely difficult. The clump method at 5 to 6 inch intervals provides an adequate seal while keeping the cooktop serviceable.
Over-tightening the mounting clips. Cranking down on the mounting hardware puts direct pressure on the quartz edge. The silicone does the sealing work. The clips just hold position. Tighten them finger-snug, not wrench-tight.
Waiting too long to remove the tape. Once silicone starts to skin over, removing the masking tape will pull and distort the caulk line. Set a timer for 10 minutes after you lower the cooktop and remove the tape promptly.
Not cleaning the surface first. Even a thin layer of cooking grease or dust will prevent silicone from adhering to the quartz. The isopropyl alcohol wipe-down is not optional. It is the step that determines whether your seal lasts two years or two months.
Cooking before the cure is complete. Heat accelerates silicone curing on the surface but can prevent deep curing if applied too early. Wait the full 24 hours before turning on the cooktop.
FAQ
What do you seal between stove and countertops?
Use heat-resistant 100% silicone caulk, preferably an RTV silicone product rated for high temperatures. Avoid latex or acrylic caulk, which cannot handle cooktop heat and will crack within weeks. Look for silicone that contains mildewcide if your kitchen is humid.
How to seal a cooktop to a countertop?
Clean the quartz edge and cooktop rim with isopropyl alcohol. Apply masking tape to both surfaces. Place hazelnut-sized clumps of heat-resistant silicone every 5 to 6 inches along the quartz edge. Lower the cooktop into the opening. Remove the tape within 10 to 15 minutes before the silicone skins over. Allow 24 hours to cure before using the stove.
Do you have to seal a quartz countertop?
No. Quartz countertops are non-porous and do not require a penetrating sealer on their surface. The sealing described in this guide refers to filling the gap between the cooktop rim and the quartz cutout edge, not sealing the quartz material itself.
What is the best sealer for quartz countertops?
For the cooktop-to-countertop gap, the best product is a heat-resistant 100% RTV silicone caulk. For the quartz surface itself, no sealer is needed because quartz is engineered to be non-porous. If you are choosing silicone for the cooktop gap, select a product with mildewcide resistance and a color that matches your countertop.
What happens if you seal quartz countertops?
Applying a penetrating sealer to a quartz surface will not damage it, but the sealer will not absorb into the stone because quartz is non-porous. The sealer sits on the surface and can create a hazy or streaky film that is difficult to remove. Save your money and skip the surface sealer for quartz.
Wrapping Up
Sealing around the stovetop in a quartz countertop is a manageable project that protects your kitchen from moisture damage, food debris buildup, and cooktop shifting. The key is using heat-resistant 100% silicone, applying it in clumps rather than a continuous bead, and removing the masking tape promptly before the silicone skins over.
Take your time with surface preparation, because a clean quartz edge is the foundation of a lasting seal. And if you ever need to remove the cooktop for repairs, the dental floss or extendable blade method will get the job done without damaging your countertop.
With the right materials and about 30 minutes of hands-on work, you can seal that gap confidently and keep your kitchen in good shape for years to come.